
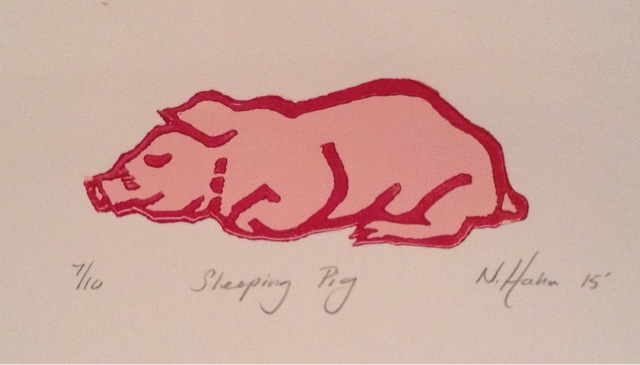
I'm excited to introduce 'Sleeping Pig'. Sleeping pig is a block print. Let me share the process of making this charming little print. First watch this video and than let me break it down step by step.

I used a soft block, you can see it in pink. A lino cutter with Linoleum Cutter blades. First I drew a square around the block to get an idea of the size. Than I drew my pig.

I transferred the image to my block by rubbing the back of the paper and letting the graphite go onto the block.

I cut away the material from the outside of the pig. I made sure to always cut away from my body for safety. I'm cutting away the negative space.


I used a box top to help me register the block and paper. This means that I wanted the block to always be in the same place and the paper to always be in the same place. That way, when I print my second layer of ink, it will line up. Let me show you what I mean.


For this project I had lot's of black in, but I didn't have any pink. I improvised by using acrylic. I had to make the acrylic a little more fluid so I use Liquitex Medium to assist in this matter. It did a great job and I got the perfect consistency.


I inked up the brayer. For this I wanted a very thin layer of ink/paint. To much of the ink can make it slippery or gush off from the block.

I hung the prints up in my house using clothes pins. I cleaned everything up and started working on the block again.

This time I wanted to only leave where I had drawn with the pencil. Everything else I removed with the lino blades.

I repeated the whole process again... rolling the brayer, inking up the block, registering the block and then the paper and printing.

Again, I let the pigs dry.

When you are printing, there are often some that don't turn out just right. You can't call them part of your series. You pick the best ones, the ones that look the most alike and place them together. The others can be used for other purposes such as sending a note to grandma or placing it in your sketch book.

When you are done separating your prints, count up how many 'good' ones you have. That is the bottom number of the series. The top number identifies what one our of ten (in this case) the print. In the middle, you put the title 'Sleeping Pig' and on the right hand side, you sign your work and place the date.
No comments:
Post a Comment