Over break, I chose to create! Well, let me rephrase that... Over break, I was encouraged to either use some of my craft supplies or get rid of some of it by my husband. I choose to do both :) I have an excessive amount of fabrics in my closet and yes... I want to use it (so I can buy more). In addition to fabric, I have zippers galore that were donated to 'the art teacher' once upon a time. That is where this little bag came in. My plan was to make a few bags to have in my classroom for my colored pencils. I have one bag per table. It's a perfect fit for pencils and a handheld sharpener.
As most of my sewing projects go... I don't have a clear pattern. I'm sharing these steps with you as a loose way to make a bag 'kind of' like the ones I made. I'm not a professional pattern writer but I will do my best to share how I made this bag.
Supplies:
- 11" X 17" Outside Fabric
- 11" X 17" Inside Fabric
- 2 4" X 8" Contrasting Fabrics
- 20" zipper
I created a 'pattern' by taking a 5 1/2" by 17" rectangle of paper and curving off the top half as shown above. The tall side is then placed on the fold of the two large fabrics to create a curve like in the mushroom fabric above.
Then I took one of the small contrasting fabrics (4" x 8") and ironed it into fourths as shown above. I folded the raw edges into itself to reach the center. I then stitch a line on either side to create a long tube. Push the top of the zipper into the 'tube' and sew it in.
Fold the fabric to the back to create a loop and sew it one more time onto the zipper as shown below.
Center the newly sewn looped fabric at the top of the curve on the inside fabric. With the zipper up and open, use LOTS of pins to attach it to the fabric on both sides. If the zipper is tough, you can cut little notches cut into it to allow for a better curve on the fabric.
Do this to both sides... Did I mention to use a lot of pins?
Place the outside fabric face down onto the inside fabric. Why don't we just add a few more pins to make sure it's nice and secure?
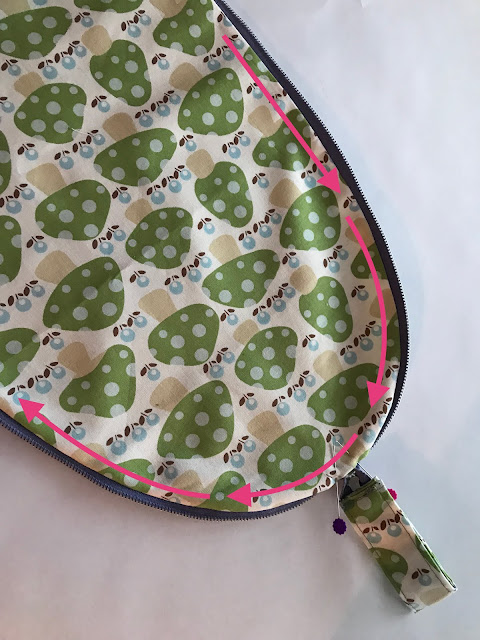
Sew around the edges to sew the inside fabric, zipper, and outside fabric together. Here is my tip... I started from the top of the fabric and worked my way down on either side. There was a space where the zipper head is. Don't worry, we'll get that later.
Now pull the project right side out. You will have to sneak the handle loop and zipper through the hole left at the top as well. Now iron the project flat on both sides.
These two images show how I simply folded the edges down at the top of the zipper. I pinned it in place and then did another row of stitches on the front as shown in the image below. This secures the zipper again and it closes the hole at the top by the zipper.
Now close the zipper shut. It's starting to look like a bag now!!
Center the zipper as shown below. Pin the bag to itself to create a flatness to the bag bottom. You will need to trip the bottom of the bag. If you feel more secure, you can draw a straight line on the fabric and sew on the line, then cut. the drawn line will be covered up with the next step.
I repeated the same folding method as I did with the handle for the top. I divided the fabric in quarters with a fold and short press under the iron. Then I sewed the edges as shown.
I folded the raw edges in and sandwiched the end of the bag into the folded material. Pin that sucker down and sew around the whole rectangle. (as shown in pink)
And there you have it! A finished bag! I will be working on more bags to use up some more zippers. I love this style of bag and will be playing with the sizes to use up the different lengths of zippers.
Because I know that most of the viewers of this post will be Art Teachers... I wanted to share the lovely fabric that I know will get comments on. This fabric was sent to me by a friend and let me tell you, there is really nothing that could be more uplifting and lovely for a person who sews than a fat quarter showing up in the mail unexpected. I looked it up for you and you can find the fabric here. I was using up fabric for this project but let me tell you... I used the 'good stuff'. If there is something that I embraced several years ago it's that... don't save that very special stuff... use it and love what you make! I love these bags (and the fabric I used for them).


Very cool!
ReplyDeleteOMG, I just adore little “bags” but I don’t know if I could part with them for use in my classroom. Thanks for sharing!
ReplyDelete