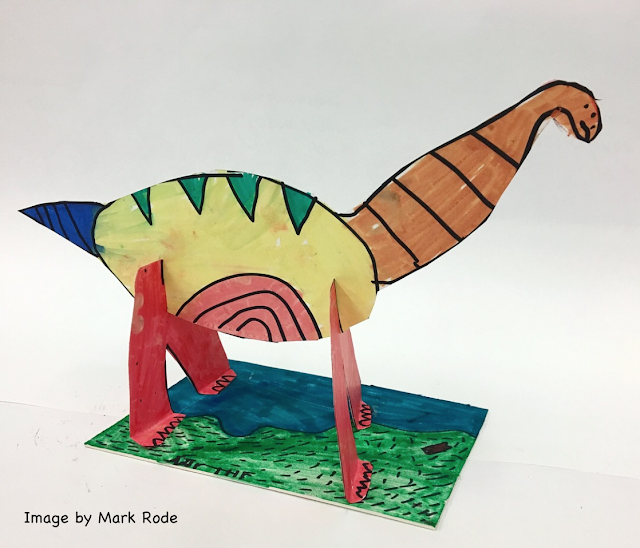
 I'm so VERY excited to present my very first guest blogger on MiniMatisse. I met Mark Rode a couple months back at a training and we share our social media information with each other. I have been so impressed with Mark's Instagram that I asked if he would write a blog post about this amazing project.
Mark is an Elementary Art Teacher at Oxbow Creek Elementary in Champlin Minnesota. He explains that his inspiration came from another teacher in West Australia, Ann Farrell. I'm a fan of her work as well! Please be sure to check out her blog, Use Your Coloured Pencils. Mark maintains an amazing Instagram account, @oxbow_creek_elementary_art. He is also active on Twitter, follow him @oxbowart. Here is what Mark had to say about this captivating project.
I taught this project to my first graders to kick off their unit on form. It took two 60 minute classes, but next year I may stretch it to three, as it was difficult for some to finish on time. There are so many great books on dinosaurs too, and having time on the third day for reflection would be ideal. Nevertheless, I felt like this project was a great way to begin working in three dimensions, as it let students figure out how to make something stand up and occupy real space with familiar materials and subject matter (who doesn’t like dinosaurs?). After teaching this lesson, I had multiple students bring in other versions to share that they had made at home, as well as some other paper sculptures, which I felt was a good sign.
When I was a kid, I was obsessed with dinosaurs. I even wanted to be a paleontologist when I grew up! There is still a big part of me that gets excited about them, so it was really fun to share this excitement with the kids. Of course, in every first-grade class, there are always a few dinosaur experts who love to share their unique knowledge on this subject as well, so I introduced the project by displaying pictures of a variety of dinosaurs and facilitated a lively discussion. We talked about different characteristics that we noticed, as well as compared and contrasted the different types.
I then told them that they would be making a dinosaur sculpture, and demonstrated how to begin. I told them that they were going to get two pieces of tagboard, one wide and one narrower. They would also get a sharpie marker and a stencil for the body shape and legs (these were made from brown tag. I usually don’t use stencils, but I made an exception with this step, as the success of the final work was heavily contingent on getting these shapes right…).
I told the students to trace the body shape on the large sheet of tagboard, right in the middle. After that, they added the other features (neck, head, tail, horns, designs, texture, etc.). I then told them to trace the leg stencil on the smaller sheet. Depending on the type of dinosaur, they would either do this once or twice (an Allosaurus walks on two legs vs. a Brachiosaurus that walks on four). After adding details, I told them they had to cut out the dinosaur and the legs. They then had to flip the body over and add details on the other side (it is important that they cut out first before flipping).
Finally, they added color on all sides with a marker. I told them that scientists don’t know for certain what color the dinosaurs were, so it was really up to them to color their dinosaur how they thought it would have looked. This, I believe, gave them more creative agency, and I think, in the end, they looked more interesting because of it.
On day two, we reviewed the steps. I then said that I would give them a piece of matboard for the base and that they had to draw the setting for their dinosaur (bird’s eye view). They also had to make a few slits (one on the top of each leg and one or two on the bottom of the dinosaur). I then showed how to make it stand by carefully connecting the slits together. In order for it to be sturdy, it does require some wiggling and finessing. When they got to this point, I told them that it was really important for them to try to get it to stand up. This was challenging for many, but it was good for them to work through it and problem solve. I also stressed the importance of helping each other out. Once they got the legs on, I added hot glue to the bottom of the feet and glued the dino to the base. Most students were able to get it to stand, but there were a few that needed some assistance from me. At the end of the class, we all had our dinosaurs on one table and it was such a pleasure to see them all together!
This project was predominantly product based, but also gave a lot of room for creative decision-making. The goal was to have the dinosaur three-dimensional. The main concept was form, although we also talked a lot about shapes, lines, and textures.
Here are some of the project samples that Mark was so generous to share with us. For more images of this project and so many other amazing projects, please be sure to follow Mark on Instagram @Oxbow_creek_elementary_art.


No comments:
Post a Comment