

This was such a success for my kindergarten students last year that I really wanted to share it with you now. Due to the bright colors and simple steps, this project was a winner for my Art to Remember fundraiser for my youngest Artist. It's always hard for me to find a lesson that can be successful for all students at the start of the year when my K's are coming in with such diverse backgrounds. I found these simples steps to be age appropriate for the students of my classroom.

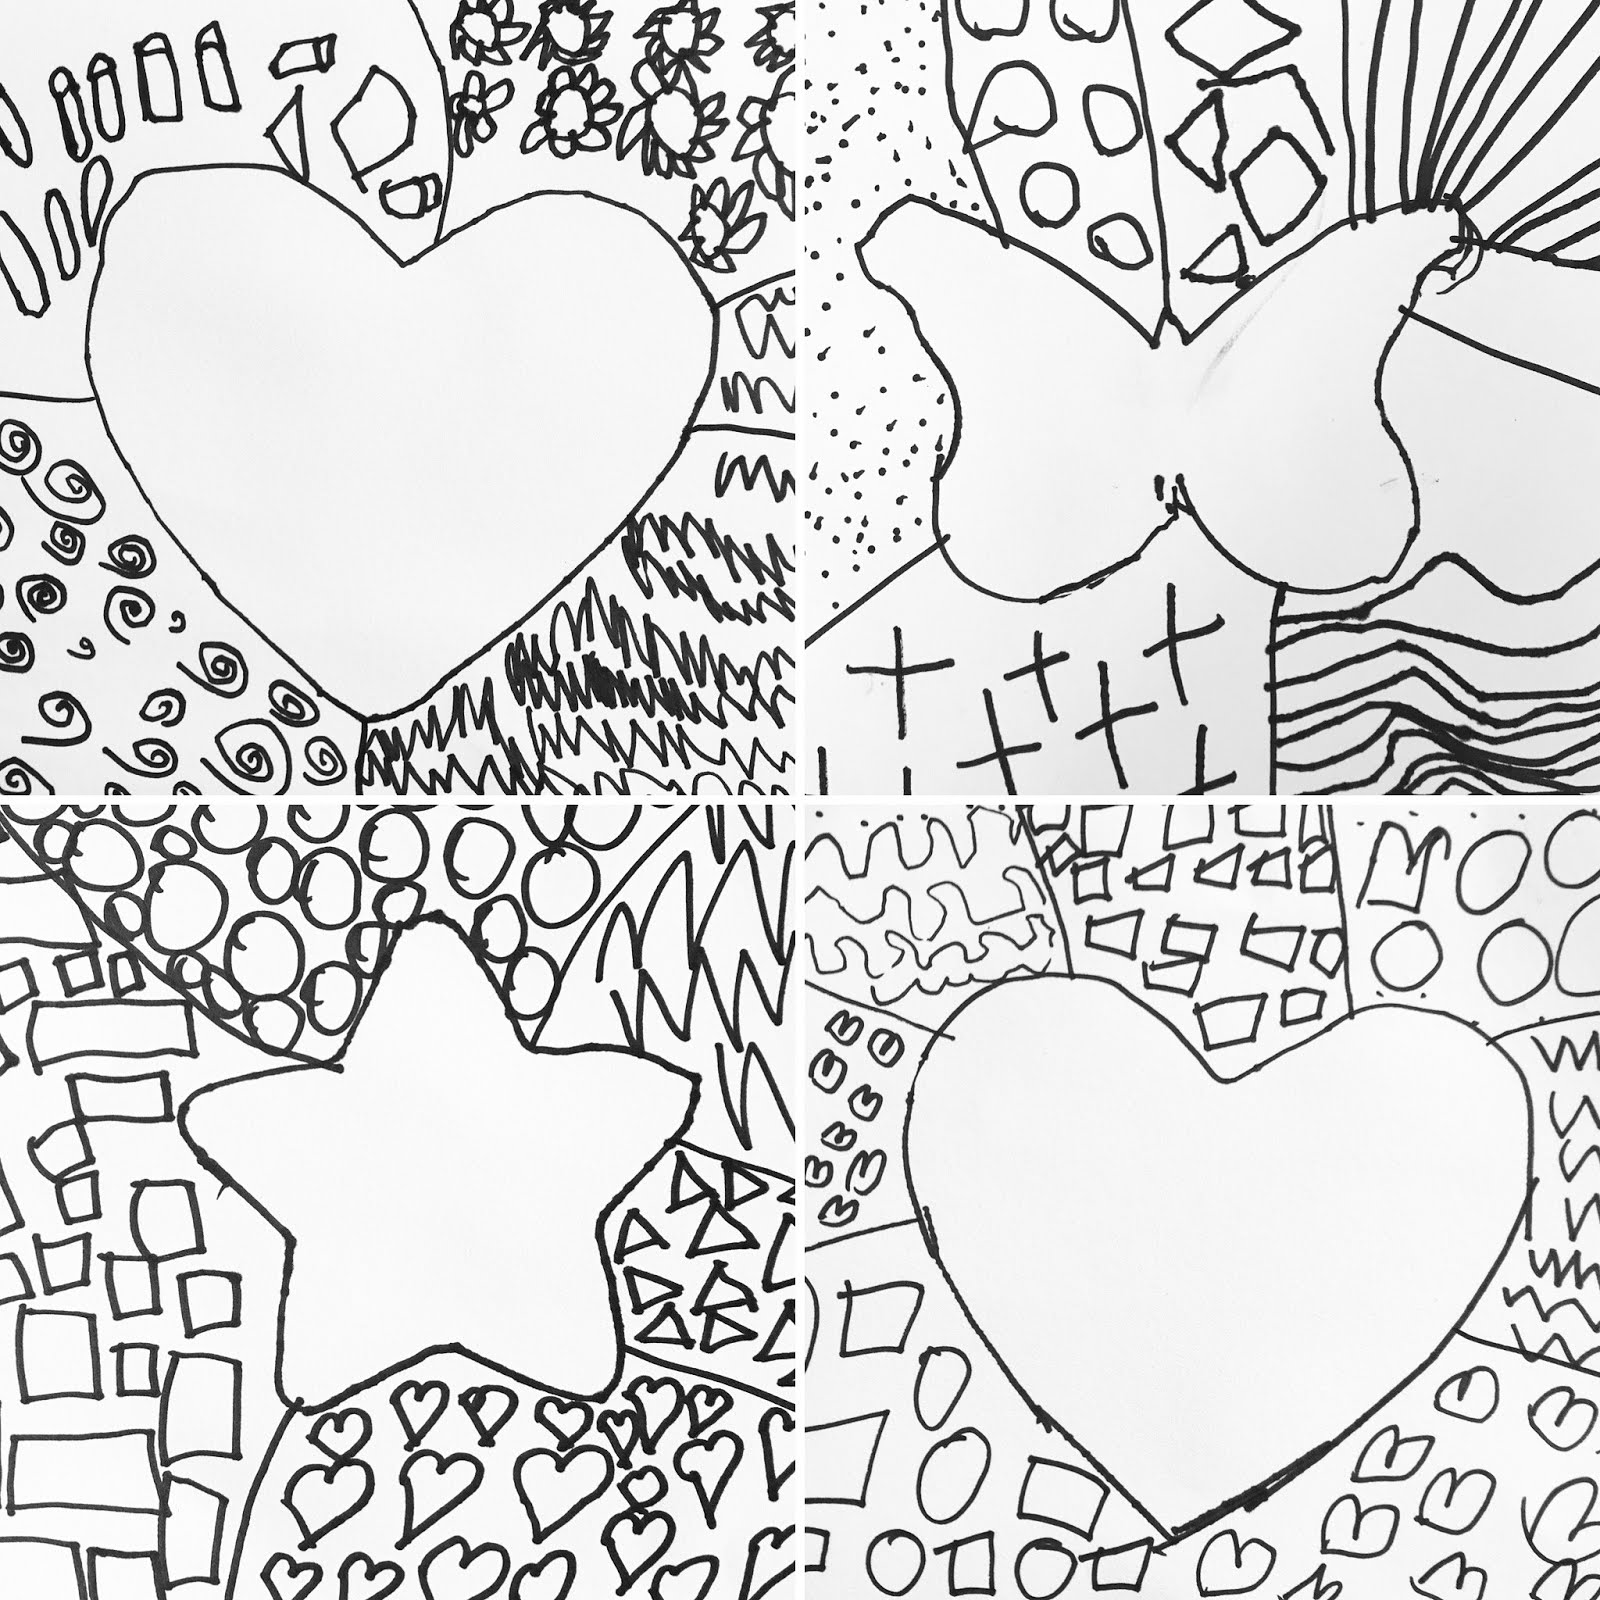
As the video shows, I had students start with a tracer in the center of the paper. They then drew 5 lines from the shape to the outside of the page. When demonstrating this I also showed a non-example of what it would look like to have all the lines on one side. This encouraged kids to use their whole page.

Once the page was divided, students created shapes and lines to make designs in each of the spaces outside of the shape. Having lot's of resources for the shapes and lines was important. (see slideshow at the bottom)
The students added oil pastel in each of the designs. I had a bucket of oil pastels that kids would go to to get one oil pastel. Then when they were ready to change out the color they would come back and 'trade the color in'. I love doing this so kids are moving around the room... movement helps my wiggly kids for sure.

Another classroom management tip: I place boards down on the table tops when students are working with sharpies so that if they go off the paper, it doesn't end up on the table. I call these drawing boards.

One color I did not let students use when adding oil pastel was black. I used black later on in the project when I had students trace the shape and lines to help them stand out.

The marker prints were a blast. I did this in small groups as students were working on another little project independently. This was my set up, plastic sheets over white pieces of paper. The plastic was taped down and the paper was there to show students how big of a space they needed to color on with the markers. You could also get a volunteer to come in and help with the station if working independently is not a skill your students have yet.

This is one of the crews in action. The fun part about this is that it really didn't matter how the students colored on the plastic. One thing I emphasized was lots of colors, other than that, it really didn't matter.

Students then squirted some water onto the plastic. I also had a spray bottle in hand that allowed me to give a little extra squirt if needed.
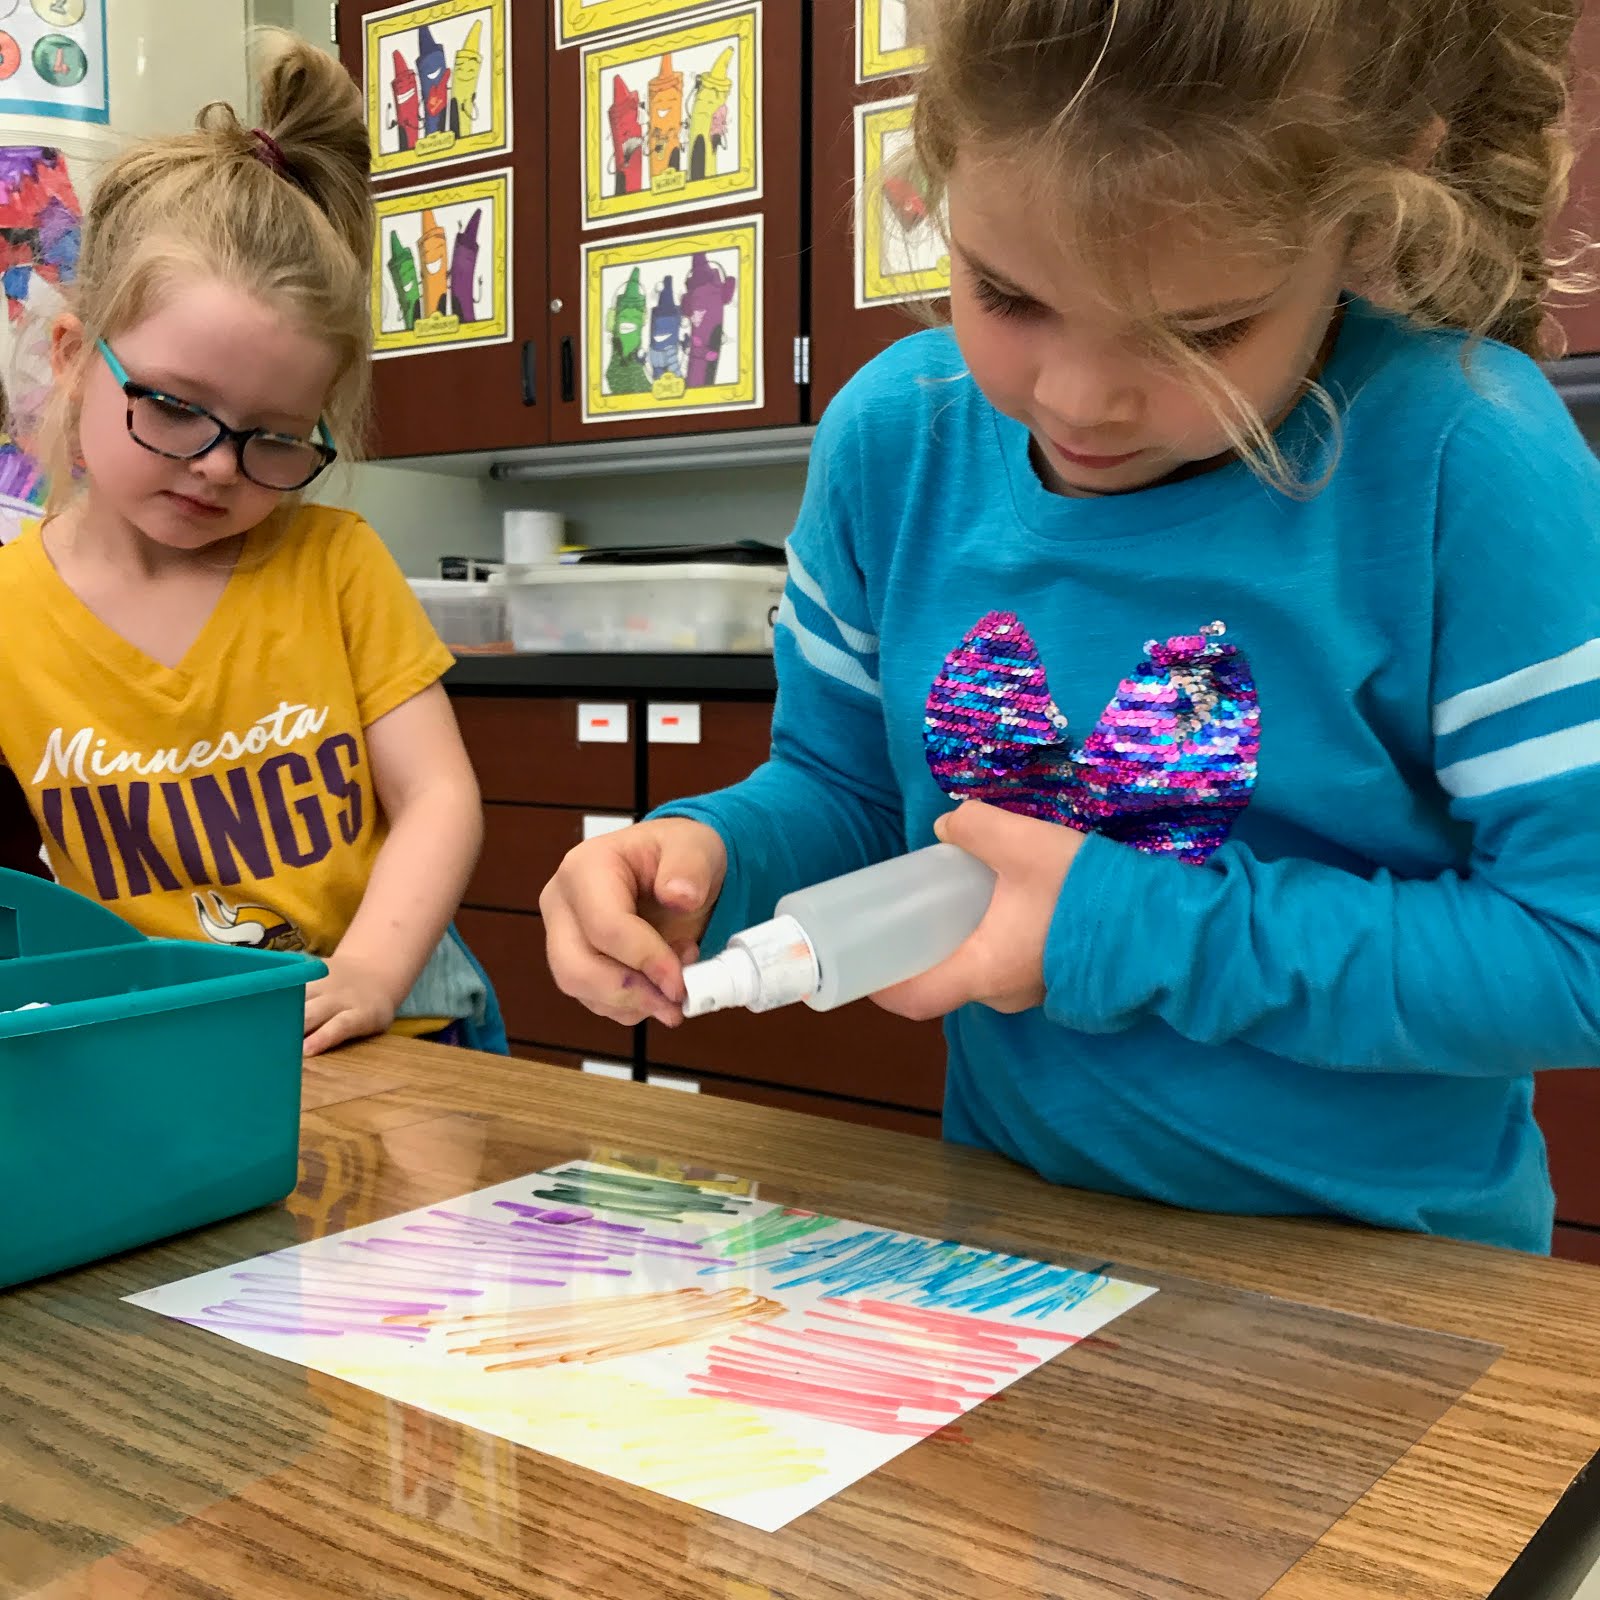
Finally, the kids pressed their art upside down onto the wet marker. They gave the paper a good "back massage" and the colors transferred to their paper. It was magic!!


Below was a simple slide show that I had students use as I instructed. Feel free to use it as well.
No comments:
Post a Comment