The 7th grade studied the idea of Emphasis with this project. As you can see the students create a shape with negative space. They colored the outside of the work with construction paper crayons. We happened to have paints out for the 8th grade so I asked students to add some dot designs to give their work a little more interest.
Zentangle's again:) I love offering Zentangle's as a beginning drawing project for my 8th grade. Most artist feel successful with these repeating doodles. I have tried a couple of things with the doodles (Book Covers, and Zentangle Me ). This one really focuses on negative space. I like this one. Again, it was a good beginning because i had the students trace the outline of an image. I want to let them know that can be successful right away, and let go of the 'I can't' attitude. Zentangles are perfect repetitive patters that are simple and relaxing for most students. I was happy with the results.
More examples can be found on our Flickr account. (click here)
This is a REALLY fun way to create fashion. I mention in the YouTube video below that I was inspired by an Art Teacher from Australia @TallShortArtist. The IG account is worth checking out... some really good content. There are so many variations of how to use negative space for fashion. I know you are going to come up with something AMAZING!!! Watch the video and choose how you will create.
Below is the Slide Show I used for the recording above. Feel free to forward through the steps using the Google Slide so you can learn at your own pace.
I love the end of the year because there is so many opportunities to get outside with your students. If it is even a somewhat nice day outside, I'm out there with my students. K's had a blast making their own dots outside after reading the book The Dot, By Peter Reynolds. This is such a versatile book. Kids love to listen to teachers read, but we also ended the hour with a video of the book too.
We started out with layered dots.
Some dots were more about mixing the chalk... and not really dots at all.
Up in the left corner of the image above was a 'not dot'. they designed the area around the dot (negative space). And below, a water mellon dot. They thought it was hilarious when I told them they could not eat the dots :) I should really be a stand-up comedian (for kindergarteners only).
We took a picture next to our gallery and also did a gallery walk on our way in. These messy little artist loved the art day outside.
The 2nd through 5th grade students are working with Lisa Arnold, our artist-in-resident to create a group mosaic. I wanted to have 1st grade work on mosaics too. I choose the theme of home for the students to create an image from. We reviewed the Kindergarten shapes and use circles, squares, rectangles, and triangles to draw the house with and create design. They used construction paper crayons on dark paper on day one.
On day two, I demonstrated how to use a ruler and we drew two horizontal lines, and two vertical lines on the back of their page. They then finished coloring and cut on the lines. They placed pieces of their house back together using negative space in between.
Tip: If you are working with many classes, ask them to write their teacher code along with their name. A teacher code might look like B-1 for Mrs. Bower's 1st grade class. I often use different colors of paper for each class as well. This way if they forget to write their teacher code on the back you still know what group the art belongs too.
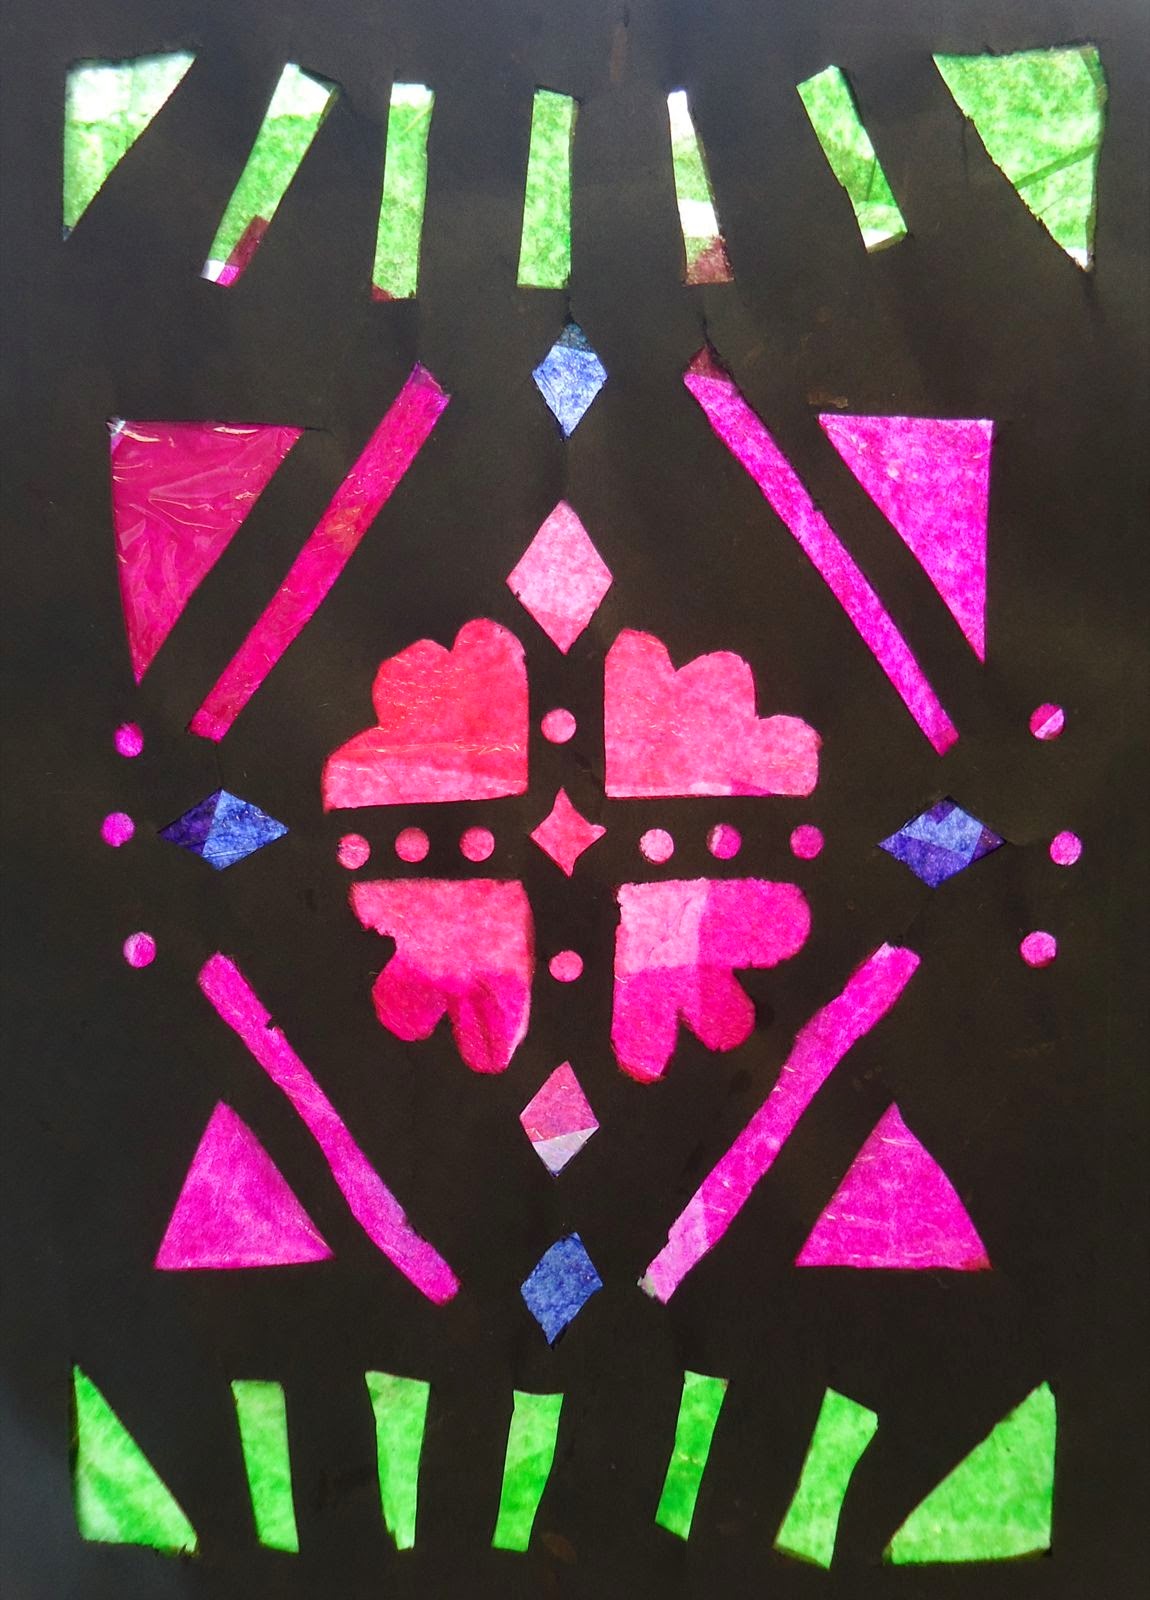
Another great project from Amanda Loidolt, my student teacher. Amanda did stained glass projects with my 7th grade. She was talking about the concept of variety in this project. She had the kids fold a 12 x 18 sheet of black paper and cut out the negative space. They then sandwiched the tissue paper in between. They turned out really nice. Good work Amanda!
I was recently introduced to the brand, Big Chill, and I thought it would be fun to come up with a kitchen design inspired by their colorful products. I used the app Brushes, my favorite drawing app, to experiment with layers. The drawing and design was inspired by this beautiful “beach blue” stove, a product of Big Chill.
I took a picture of my kitchen for inspiration for the drawing. My husband almost flipped when he saw what I was doing because we have only been in the house for 5 years and during that time we have redone almost everything. This kitchen was the first thing we worked on. He thought I was making plans for a change (and maybe I am :)).
To go with these products I found a couple of things that would make this 'pretend kitchen' happy.
I have had this pinned for a long time and I'm just trying to figure out the best place to do this tile with colored grout. Isn't it fun. In my design kitchen, I was going to place it on the backsplash behind the counter and behind the bookshelf as well.
In this kitchen, I get everything I want... right? Sure why not. I would have Miriam Paternoster from ArteaSculoa (recent winner of AOE blog of the year) make all my dishes. I would get measuring cups, glasses, plates and coffee mugs (even if I don't drink coffee). I would eat off these dishes and be happy every day.
The bike print in the image above is a print from Sarah Welch from Wooden Spoons Editions. I love her work. As you can see from the print below, she has some strong use of negative space. I love that this lady is a Minnesota Artist and so very skilled at her craft!
I might add some splashes of color from World Market. Lot's of the unique furniture in our house if from World Market. I feel that their stuff is ever changing but holds true to looks that I can appreciate. I love shopping there.
And because I'm me, a kitchen would not be complete without an apron. This is my favorite pattern from Amy Butler called Domestic Goddess. Again, this is dream-world, so I would splurge on some of Amy Butler's fabric too. I'm currently on a fabric 'freeze' until I use up what I have a bit more. ;)
It was fun to have a little dream session involving some great products. Thanks for the challenge Big Chill!
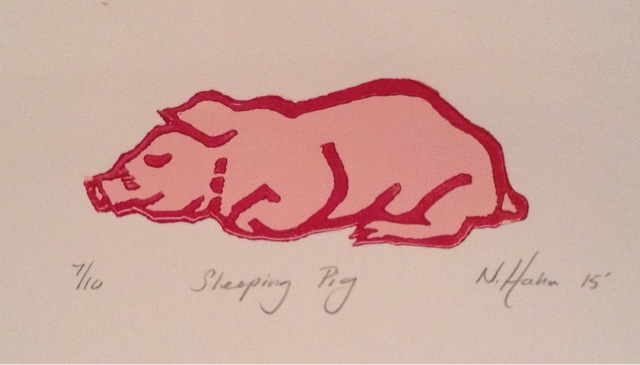
I'm excited to introduce 'Sleeping Pig'. Sleeping pig is a block print. Let me share the process of making this charming little print. First watch this video and than let me break it down step by step.
I used a soft block, you can see it in pink. A lino cutter with Linoleum Cutter blades. First I drew a square around the block to get an idea of the size. Than I drew my pig.
I transferred the image to my block by rubbing the back of the paper and letting the graphite go onto the block.
I cut away the material from the outside of the pig. I made sure to always cut away from my body for safety. I'm cutting away the negative space.
I used a box top to help me register the block and paper. This means that I wanted the block to always be in the same place and the paper to always be in the same place. That way, when I print my second layer of ink, it will line up. Let me show you what I mean.
For this project I had lot's of black in, but I didn't have any pink. I improvised by using acrylic. I had to make the acrylic a little more fluid so I use Liquitex Medium to assist in this matter. It did a great job and I got the perfect consistency.
I inked up the brayer. For this I wanted a very thin layer of ink/paint. To much of the ink can make it slippery or gush off from the block.
I hung the prints up in my house using clothes pins. I cleaned everything up and started working on the block again.
This time I wanted to only leave where I had drawn with the pencil. Everything else I removed with the lino blades.
I repeated the whole process again... rolling the brayer, inking up the block, registering the block and then the paper and printing.
Again, I let the pigs dry.
When you are printing, there are often some that don't turn out just right. You can't call them part of your series. You pick the best ones, the ones that look the most alike and place them together. The others can be used for other purposes such as sending a note to grandma or placing it in your sketch book.
When you are done separating your prints, count up how many 'good' ones you have. That is the bottom number of the series. The top number identifies what one our of ten (in this case) the print. In the middle, you put the title 'Sleeping Pig' and on the right hand side, you sign your work and place the date.