I have been working on the weekends and evenings to create a happy place to welcome guest... if we can ever have guest to our house again. I'm ready for when this COVID thing is all done. Anyway, I'm going to post on this for a couple of reasons. One, I have been posting things little by little and have been asked, where did you get... or what kind is that?? Let me try to add all the links on this post now to answer all the questions (but if I forget something, let me know :) ). Two, I want to remember what plants I bought this year and what paints I used so I can purchase the right things in the years to come. I have a really bad memory for these things.
So here is the before... Nothing really wrong with it, just wanted something different.

I took this picture above and started designing. I wanted to explain my ideas to my husband so he could see my vision clearly. I fell in love with this first image that has a wooden deck added onto the side so we could have more room. He was fine with it as long as I didn't paint our front door pink.... it was a deal.


I thought about this idea of covering the stained and old concrete and that lead me to paint. Why don't I just paint it. So I started my research and bought some paint. The minute I picked up the paint, my neighbor who is in the trades, strongly encourage me to not use what I had bought. Mostly winter issues and how it pealing off... He gave a couple more reasons but overall, I trust the guy and sent back the paint.
That put my husband on the path of researching concrete stains. We were happy to find a product from a local concrete place less than a block away (Brock White). We first used the suggested degreaser from Prosoco and power washer. We also cleaned off the posts and took care of the chipping paint.


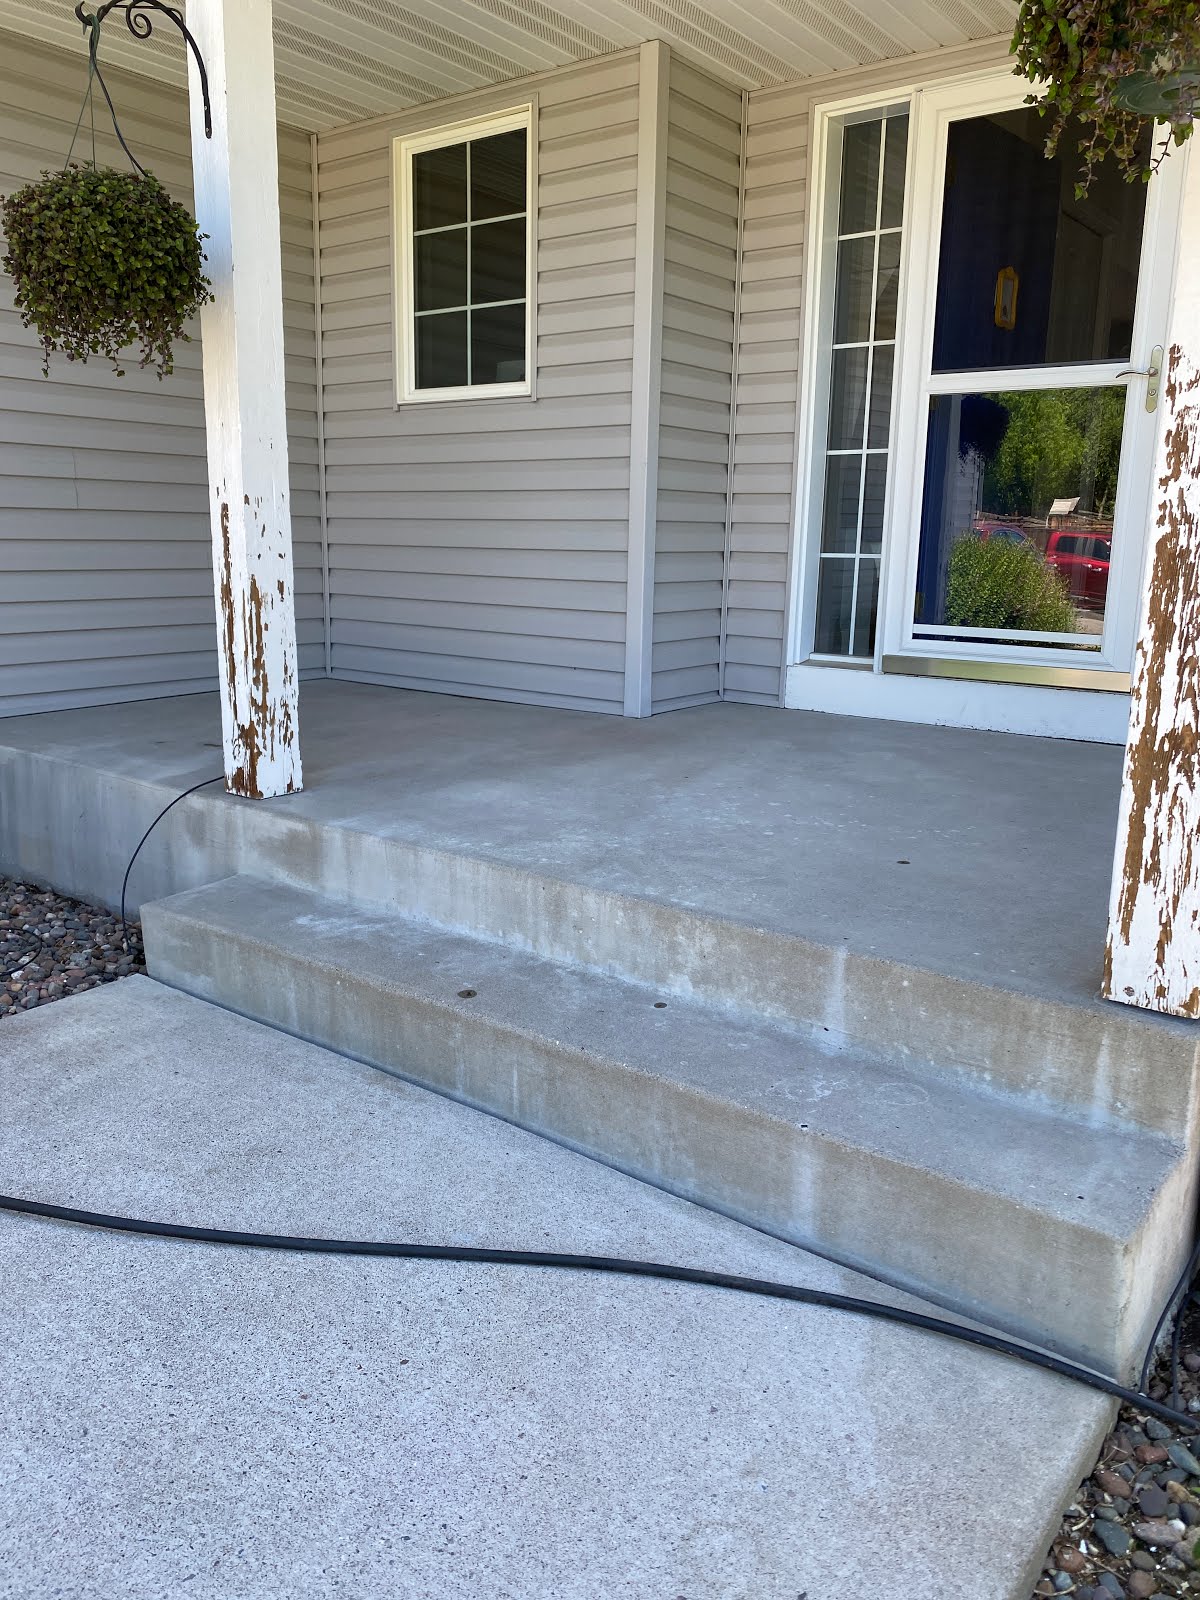
Then we waited for low humidity, and a sunny day. I started early in the morning brushing the edges and sides of the concrete and then rolling the top services with this very strong smelling product. It's from a company called Increte and we tried to take every precaution when using it. Eye protection, tall rubber boots, plastic gloves, and well a ventilated area... All the good stuff to do this right! I applied a second coat 4 hours after the first and let it rest over night before putting anything on the concrete again. A quick sand and repaint on the column and we were done with the base of the front porch.

Now to decorate. I used my good bargain deal shopping skills finding all the coupons and sales. After the number came back on the macitence-free decking materials, the prices of the accessories didn't seem that bad.

Both of these rugs were bought at Wayfair. I love the welcome mat. It's really thick and I love the shape. It's a little messy dropping bits of fiber, but not really too bad. The rug under is right in my wheel house. I love the size for the space, and the texture. Another purchase from Wayfair was the potters by the door. I was looking for something that raised the plants but also was not tippy. These are perfect, and I think they will look great in my house in the winter.

The lower potter was from Goodwill... You know just one of those finds you run across at a thrift store that makes you come back for more. The little white plant was purchased because I had never seen that kind of a plant before. It's called a Crispy Wave or Japanese Asplenium nidus fern and was purchased at Home Depot. I also picked up the Jace Cache or Crassula Ovata and Croton 'Red Mammy' or Codiaeum variegatum there. The plant in the tall pot, I'm not sure what the name is, I got it from my Grandma Tweite years ago and it has had many generations of babies,


Continuing with the green on the front porch, I have a table that I also bought at Goodwill that fits so nicely on the end of the couch. It holds some of the many plants I have in my classroom. It's nice to have a space outside to display them. Once I posted about the potter with the numbers, I had lot's of people ask where I bought it. That is a DIY pot and I have a previous post about how I made that one. The planter place inside the pot was pre-made for me from 101 Market containing Colorblaze Lime Time, Colorblaze Cherry Brandy, Proven Accents Lemon Coral, Dolce Silver Gumdrop, and Heuchera Carnival Watermelon Coral Bells.


This gal isn't done with the plants yet. This has been an ongoing and successful plant. These are called, Callisa Speces or Bolivian Jew or Turtle Vine, or Chain Plant, or even Inch Plant. No matter what you call it, It has thrived over time in this spot. It really doesn't see any sunlight until about 2pm until 8pm. We water it often but it drains well. As you can see, I have a cord going to most of the plants. This waters the plants when the sprinklers go at 5 am every day for a couple of minutes.

This is our new bench from Target. It works well now but we had to do a couple of adjustments to it. The pieces are all separate so when we would sit on it they would shift and become wonky... yes, that is what I said... wonky. They do have clasps that connect the legs to each other but they would fall off. There is metal mesh in the back and on the base so we zip tied the sections together and that has worked great. The cushions on the other hand would fall off when we sat down. To combat this I used shelf liner on the base and tied the back cushion through the mesh.
 .
. 

I spent the last two weeks out there distance teaching. I love the look of it and it fits the space well so I would probably purchase it again if given the chance to exchange.




Now for a bit of Art! I wanted to create a space for art. I was gifted a bunch of frames once upon a time from my Aunt Jeanne and I sprayed one of them with spray paint, used 3M velcro strips and hung it on the door. Now to fill it with Art. I indulged myself one night painting picture, one after another after another. I found inspiration on instagram and all Artist were tagged on my IG post. I took my favorites and ran them through a laminator and bam... I have an interchangeable frame filled with art from our home.
I'm not done. I think I need some pillows and maybe a throw blanket. We have an order in for new siding to replace the damaged areas where the railing went into the side and I'm probably going to order a new light fixture. but overall... I love our new space.