I took some training this summer called ENVoY. There is so much value in the lessons I learned from this continuing training that I am doing. One of the BIG suggestions that the philosophy gives is conserving energy as the teacher. This is accomplished with less verbal directions. I have been working on this a ton, but I thought I would share one of my experiments with you today. I'm trying a technique called, pick a stick. This is where I ask students to choose a stick from the middle of the table that is marked with some symbols and numbers. In the Art Room, we get lots of materials out, when the kids each get a stick, I can give a task... assign it a number... and the job will be completed by the student holding that number.
I'm not sure if it's going to work but here is why I'm trying again. I have given the number to chairs... the chairs get moved around the room with after-school activities and sometimes with the classroom activities as well. So there was always a number that was missing or a person who didn't want to sit in the 'number 2 chair' or whatever it would be. I then tried numbers on the table, but they got picked off. I think this might work because everytime the number that you 'pick' will be different. The number I pick... will be random and this should eliminate some of the problems I ran into thus far in classroom management.
Anytime, I offer one new change in the classroom, It's a matter of teaching 30 sections the same thing so, often I will record my instructions. The video will give a better idea of what I plan to do with the stick. As always, I'll report back if this management trick is working or not in a couple of months.
Recently I moved into my new/old classroom. I left for a year to go to another school and now I'm back. I am working on redeveloping my classroom. One of the first things to go were the color table indicators hanging in my classroom. I bought them years ago from a party store... you know the kind... the honeycomb tissue decorations? Anyway, they were lovely and worked well, but now it's 5 years later and they are faded and full of dust... well, they had a good run but they had to go.
I wanted something new, something quick, and something cheap. I was inspired by the Dollar Tree! I bought the nine floral foam wreaths for my tables and walked out with not much of a clue what to do with them. That is when I ran across my inspiration on the Gelli Plate Website. I love it!! If you haven't spent time exploring their website, it's worth an hour (or hours) of your time.
Refer to my requirements... something new- check, something cheap- check, and something quick-no... if I created the Gelli Printed Paper, it would have taken a long, long time (but would have been fun, don't get me wrong). I compromised with my crazy HUGE supply of scrapbook paper (I mean sickly, huge... lots of paper... lots). So... I started by separating the paper into color groups. Not a pretty picture, but certainly part of the process.
I created a template and started cutting... and cutting, and cutting. I created these little piles of color groups. I tried to make them random by dealing them out like playing cards and then putting them back together in a pile of 'like colors'. I would say I cut about 100 leaves for each wreath.
Then I gathered the rest of the supplies. The glue gun, hot glue sticks, paper clips, and string (they come in a little later.
Before starting a wreath, I brought each leaf through my two fingers to create a curve to the paper.
Then I started gluing. You can see from the picture below, I started with the outside of the wreath and then moved to the inside. Adding a second layer to both the inside and outside was helpful. Then, on the top... I filled in with leaves going in different directions and creating a ton of overlap.
I created the primary colors (red, yellow, blue), the Secondary colors, (orange, purple, and green), then two neutrals (black and white, and earth tones) and one pink (because I like it). You can see that I was intentional of the colors that I chose to also continuously reinforce my curriculum with even the decorations in my classroom.
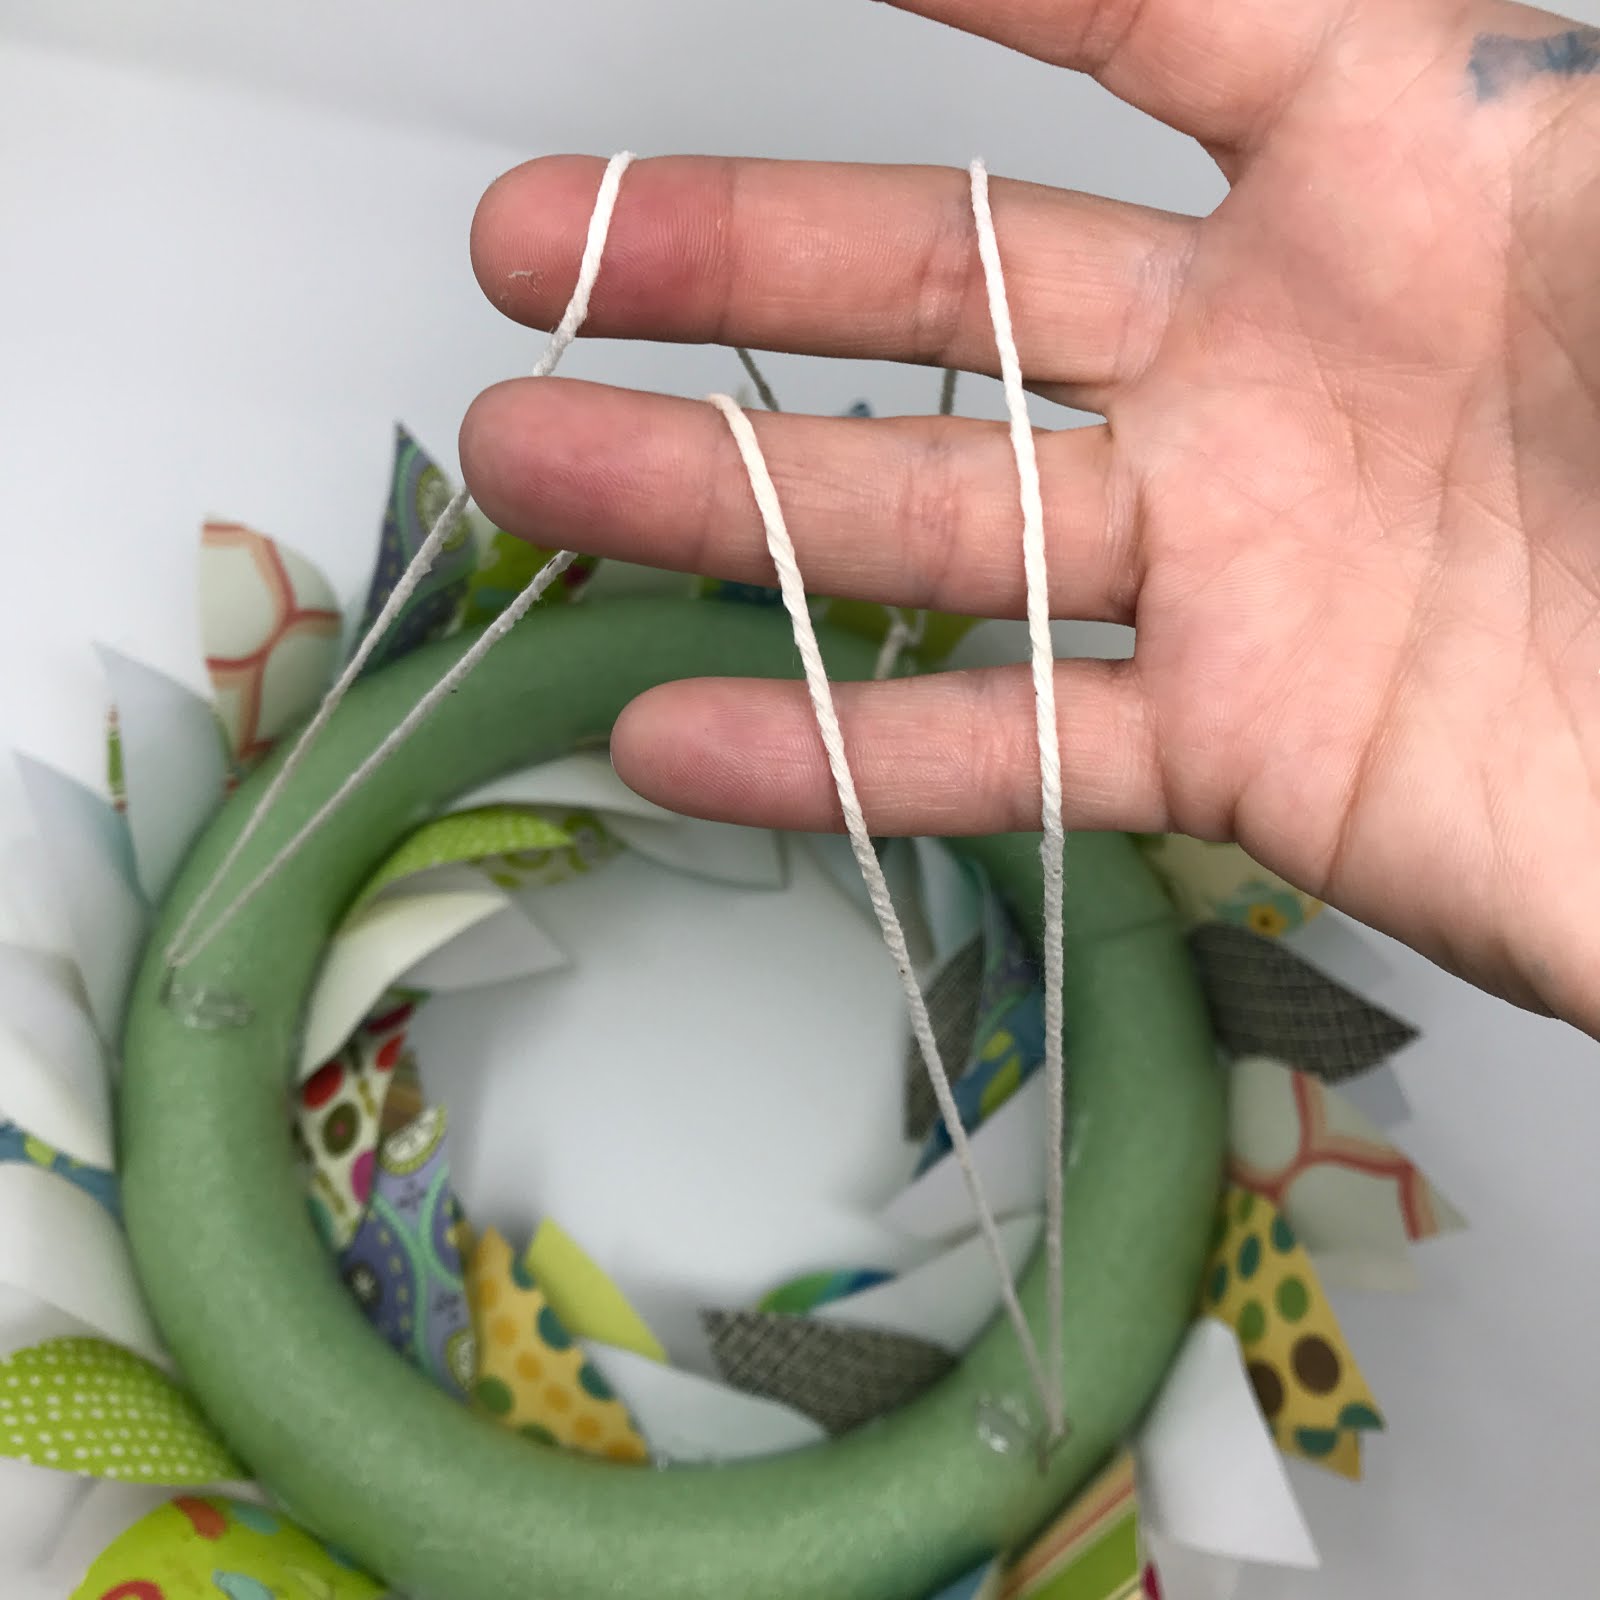
How did I get these wreaths to hang?? I'm glad you asked. Again, I was working on a shoestring budget so I used paper clips as my hangers. By bending them as you see below, I glued three clips to the 'bottom' or once hanging, top, of the wreath.
Strings were measured out so they were consistent. I ran the string through the clips.
I was able to level the wreath out with the string and added a small not on the top to keep the three points together.
Then... I repeated... nine times.
The wreaths are hung and the kids noted the change every hour since I have placed them in class. Because these little crafts were made and not bought, there is a little extra sense of pride. My students wanted to know how... I told them I would be posting. I know some kid, and their parent will create one of these for themselves. If so, share a picture and let me celebrate with you!
Over break, I chose to create! Well, let me rephrase that... Over break, I was encouraged to either use some of my craft supplies or get rid of some of it by my husband. I choose to do both :) I have an excessive amount of fabrics in my closet and yes... I want to use it (so I can buy more). In addition to fabric, I have zippers galore that were donated to 'the art teacher' once upon a time. That is where this little bag came in. My plan was to make a few bags to have in my classroom for my colored pencils. I have one bag per table. It's a perfect fit for pencils and a handheld sharpener.
As most of my sewing projects go... I don't have a clear pattern. I'm sharing these steps with you as a loose way to make a bag 'kind of' like the ones I made. I'm not a professional pattern writer but I will do my best to share how I made this bag.
Supplies:
11" X 17" Outside Fabric
11" X 17" Inside Fabric
2 4" X 8" Contrasting Fabrics
20" zipper
I created a 'pattern' by taking a 5 1/2" by 17" rectangle of paper and curving off the top half as shown above. The tall side is then placed on the fold of the two large fabrics to create a curve like in the mushroom fabric above.
Then I took one of the small contrasting fabrics (4" x 8") and ironed it into fourths as shown above. I folded the raw edges into itself to reach the center. I then stitch a line on either side to create a long tube. Push the top of the zipper into the 'tube' and sew it in.
Fold the fabric to the back to create a loop and sew it one more time onto the zipper as shown below.
Center the newly sewn looped fabric at the top of the curve on the inside fabric. With the zipper up and open, use LOTS of pins to attach it to the fabric on both sides. If the zipper is tough, you can cut little notches cut into it to allow for a better curve on the fabric.
Do this to both sides... Did I mention to use a lot of pins?
Place the outside fabric face down onto the inside fabric. Why don't we just add a few more pins to make sure it's nice and secure?
Sew around the edges to sew the inside fabric, zipper, and outside fabric together. Here is my tip... I started from the top of the fabric and worked my way down on either side. There was a space where the zipper head is. Don't worry, we'll get that later.
Now pull the project right side out. You will have to sneak the handle loop and zipper through the hole left at the top as well. Now iron the project flat on both sides.
These two images show how I simply folded the edges down at the top of the zipper. I pinned it in place and then did another row of stitches on the front as shown in the image below. This secures the zipper again and it closes the hole at the top by the zipper.
Now close the zipper shut. It's starting to look like a bag now!!
Center the zipper as shown below. Pin the bag to itself to create a flatness to the bag bottom. You will need to trip the bottom of the bag. If you feel more secure, you can draw a straight line on the fabric and sew on the line, then cut. the drawn line will be covered up with the next step.
I repeated the same folding method as I did with the handle for the top. I divided the fabric in quarters with a fold and short press under the iron. Then I sewed the edges as shown.
I folded the raw edges in and sandwiched the end of the bag into the folded material. Pin that sucker down and sew around the whole rectangle. (as shown in pink)
And there you have it! A finished bag! I will be working on more bags to use up some more zippers. I love this style of bag and will be playing with the sizes to use up the different lengths of zippers.
Because I know that most of the viewers of this post will be Art Teachers... I wanted to share the lovely fabric that I know will get comments on. This fabric was sent to me by a friend and let me tell you, there is really nothing that could be more uplifting and lovely for a person who sews than a fat quarter showing up in the mail unexpected. I looked it up for you and you can find the fabric here. I was using up fabric for this project but let me tell you... I used the 'good stuff'. If there is something that I embraced several years ago it's that... don't save that very special stuff... use it and love what you make! I love these bags (and the fabric I used for them).
Moving into a new building has been such a wonderful experience. I'm certainly happy I have several years under my belt to know what I really want/need. During my first year of teaching, I had an incident with a paper cutter. I cut my thumb really bad. This resulted in a broken bone, several stitches, and a split nail bed. I'm lucky to have a thumb but now my thumb has two nails growing out of it. Minor in the scheme of things.
I have always had a fear that a kid was going to be hurt with a paper cutter since then. I did my research and found a safe solution that was safer and could cut a large amount of paper in one cut. It also can measure more accurately.
I ordered the one above, a quick search on google allowed me to see that there are many versions of this paper cutter for a variety of prices. (click here)
Here, you have to see it in action.
This has been a great new tool for me in my classroom. I know the price might be out of the budget, but if there is a will, there is a way. I'm simply passing on my experiences with the readers of this blog!
At the start of the year, there is a lot of 'system setups' that have to be done before the classroom can move smoothly and the students can work more independently. One of the things that must be covered with my youngest artist is gluing. This is one of the most challenging skills for young Artist to create something that is going to stick... but not be flooded with glue a maintains good craftsmanship.
I always choose a very simple project for my students to be exposed to the process and different tools I provide in my classroom for gluing. This year I am choosing to teach the kids using the subject of ornamental corn.
Here is the overall lesson but I did break this lesson into little bits to have a successful product.
In setting up my room this year I worked on three different types of glue options for my students to use. One is the white glue. I use slip bottles for this because I have found that having the lack of twist cap was beneficial for my youngest (and sometimes oldest) students. I fill the bottles with the amazing Elmers glue pump and remove the little red caps. They do get dried over but that is when I ask the students to use THE GLUE UNCLOGGER 2000! They love this.
Another option I offer is the glue sponges. This year as I was creating all new sponges I thought... hey, why not use a soap square... That has worked well thus far. They are easier for my students to open and the sponge fits perfectly.
And of course, I allow the students to use the glue sticks as an option as well.
With a couple of containers and the addition of tape and a stapler... I have a nice adhesive caddy ready to go. Let the gluing began.
Many of you know this about me... but I just got my first phone. I went to the store in March and said, "I would like to buy a phone."
The sales person said, "Great, what phone would you like to trade in?"
I said, "No, It's my first phone."
Pause
"Oh" he said, "You have been sharing with your husband?"
"No, It's our first phone."
The man was so confused. Eventually, we were able to help him understand that people still survive without a phone... I was a little sad that day to join the rest of the world... I have loved being phone free, but I know my kids will have a phone sooner than later. So my job as a parent is to learn the proper use of a phone and model that for them.
Well, it turns out I use this tool all the time for school. I mean ALL the time. One of the latest tools that I have started to play with is Snapchat. What a hoot. I do not want to use it socially... I'm not snapping (is that what it's called?) my friends. I am recording and downloading to share a message with my students. I have been very inspired by GREAT educators such as Kari Haan, Holly Bess Kincaid, and Abby Schukei. Both have used Snapchat for instruction for their students.
Here is how I did it... of course... there might be other ways, but this works for me.
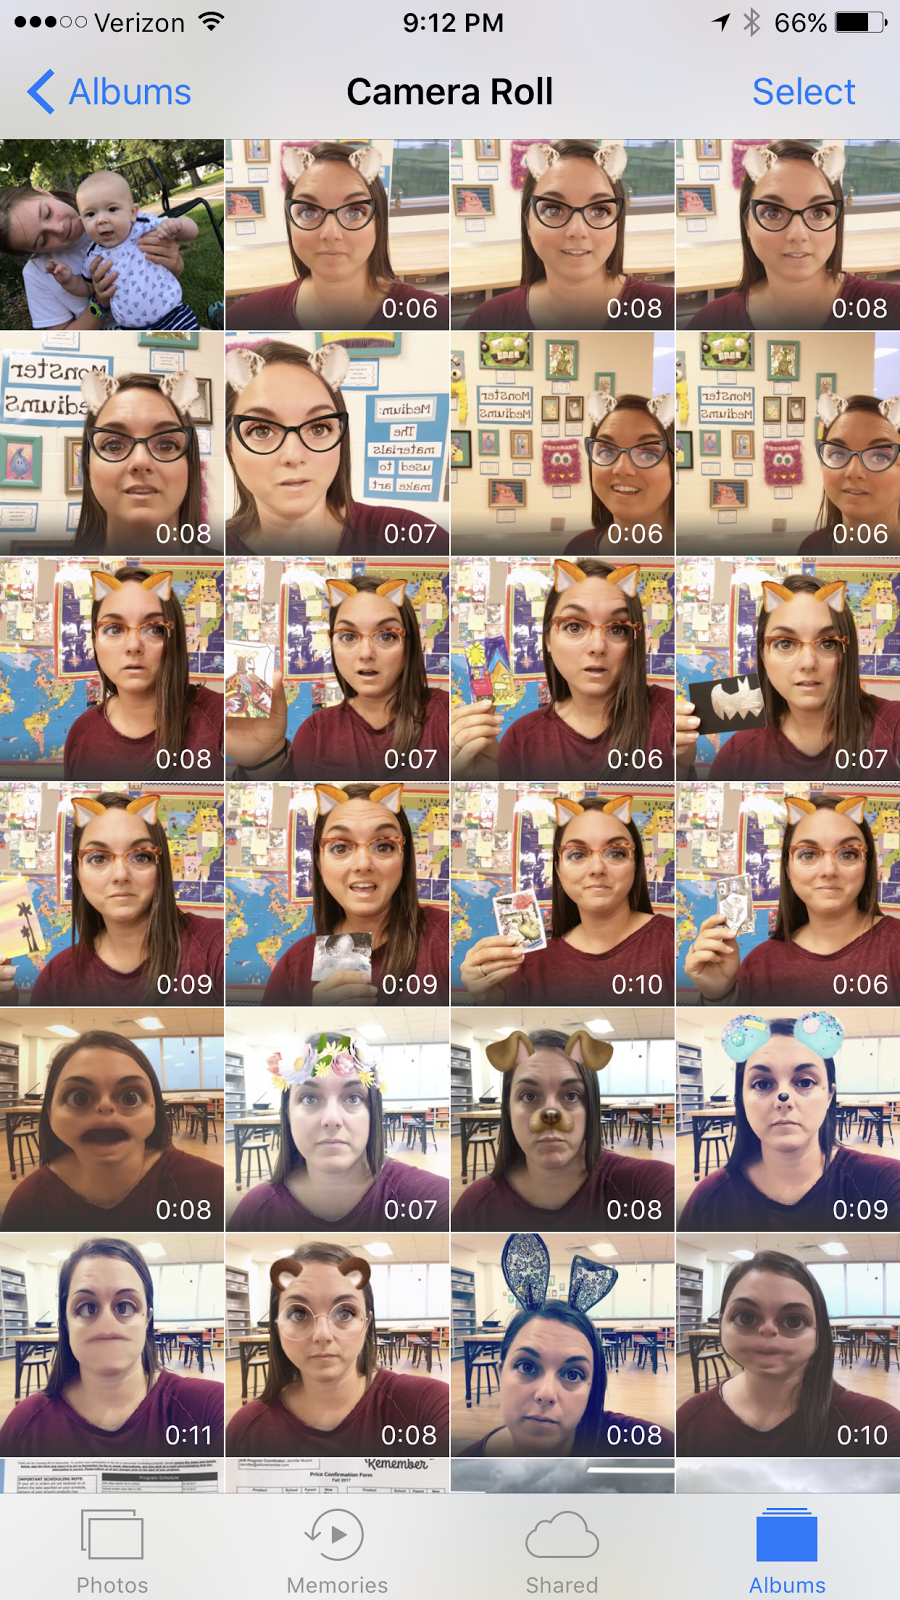
First I record my videos in short clips. Traditionally snaps are 10 seconds or shorter. Recently, Snapchat allows you to record longer videos by recording into a new video. I like the idea of 10-second clips, so that is still what I'm using. It forces me to be concise and to the point. My overall videos are right around 1 minute... that is perfect for most of my students to get a tiny bit of information.
I record a video horizontally. It appears that the video will turn out sideways, but when it's downloaded, it is the correct orientation.
I choose a filter. The filters are the things that change your face. Some of these filters are only intended for vertical use, but I have found most to work horizontally.
I record, and then download... you will be able to save at the bottom of you snap... it goes into your 'story' (that no one sees because I don't have any 'friends' on Snapchat but it also downloads to my camera roll.
Now, I go into iMovie (my favorite app on my phone) and quickly bring in the clips I recorded.
I double check the order and edit if needed then upload my new movie to Youtube.
So far there has been an overwhelmingly positive response from students. My K's are mesmerized, my 6th graders are completely entertained.
Here are some ways that I have used the Snapchat videos thus far