Showing posts with label Featured Artist. Show all posts

Saturday, July 27, 2019

Sew a Softie 2019- Stuffed Fish


I look forward to our Annual Fiber Lesson Hop that Trixi Symonds puts on in July and in December as well. She creates a blog hop where the focus is on Sewing a Softie. This year I was happy to join again doing a fish. A couple of years ago I did a fish as well (previous post) but this year I brought it up a couple notches. I have also done an owl, and my daughter was a kid ambassador once creating a Winky Rat Finger Puppet.


As many of you are finding out, because of the Everyday Art Room Podcast or the Art Ed Now conference, Billy Kheel visited my classroom in the spring of 2019. Learn more about Billy and the project we did here... Crow River Project. After Billy left our school there was a HIGH interest in fibers and sewing. We also had leftover felt at our disposal. So... Each 5th grader made a Stuffed Fish that they could take home.


Students created a unique pattern and learned how to whip stitch around the fish. We simplified the process by using tacky glue for some of the details. I also had students in younger grades stuff PAPER Fish (see previous posts). This is a tiny step to helping students understand how to create a space to add stuffing, but using paper rather than fabric.


This year, the blog hop gave me a chance to highlight a lesson I created with my students at the end of the school year. A stuffed fish that I created with my 5th grade. Take a look at the video below and learn what this lesson looks like. It includes three student ready videos, tips and tricks on materials and management and lots of student samples. I have this lesson on my Teachers Pay Teachers Page.


If you are looking to sew something different than that 'Stuffed Fish' project, I hope that this post gives you lots of links to past fiber projects as well as the following links below to several other blogs who are participating this year. As always, Thanks so much to Trixi Symonds for hosting this incredible event, you have made our world a little smaller and 'stitched' us all together.


July 4:Emily: www.makingwithmommy.com video on itv

July 5: Kylee: www.teachingtotsthings.com

July 5: Choly: www.sewdesune.com

July 6: Tina https://missdaisypatterns.com/twilight-bear-sewing-pattern-story-time/

July 7 :Amy: www.startcreativestudui.com

July 8 : Maggy: https://www.redtedart.com/teddy-bear-softie-learn-to-sew-ted/

July 9:Heather: www.heathermakessewing.com

July 10: Elisa https://www.makefilmplay.com/kids-crafts/slug-sew-a-softie/

July 10: Jen @creativekidsco

July 11: Amie Plumley https://sewingschool.blogspot.com https://sewingschool.blogspot.com/2019/07/squidget-for-sew-softie-2019.html

July 12: MaryAnne https://www.mamasmiles.com/dragon-toy-sewing-pattern/

July 12: John www.theartdeam.com

July 13: Laura Humpage www.colourfulminds.com

July 14: Arielle www.artcampla.com

July 15 : Cara: www.raisingkinley.com

July 16 : Shannon https://ohcreativeday.com/very-hungry-caterpillar-craft-sew-a-softie-project/

July 17 : Lisa www.theartgardenblog.com

July 17 Eleanor www.minimadthings.com

July 18 : Deborah www.fishmuseumandcircus.com

July 18: Samara www.purpletwig.com

July 19 : Julie https://www.sumoftheirstories.com/blog/sew-a-softie-mini-sock-snake

July 20 :Cintia https://mypoppet.com.au/makes/sew-a-softie-zero-waste-gobble-monster-doll/

July 21 : Shonagh: www.threebusyboys.com

July 22 :Kristi: www.schnitzelandboo.com

July 23 : Kate: www.thecrafttrain.com

July 24: Shelly: www.creatingcreatives.com

July 25: Joanna; www.bluebarnliving.com

July 26: Nurdan: www.mbsactivityroom.com

July 27: Nic Hahn: http://minimatisse.blogspot.com/

July 28: Lauren Wright: www.mollyandmama.com.au

July 29: Lisa: www.cucicucicoo.com

Thursday, February 7, 2019

The Countdown Begins!


Billy is coming to Hassan as a Visiting Artist very soon! This count down is to pump up the students and families of Hassan!  This is going to be so much fun people! 

Monday, September 17, 2018

Collaborative Paper Quilt


I'm a person who is often inventing my curriculum over and over. I love the creative part of lesson plans. This year, I was greatly inspired by Don Masse of Shine Brite Zamorano who does a collaborative paper quilt every year with his students. I have always been impressed and this tradition is a highlight for Mr. Masse's school.  This year, as I moved schools, I thought... keep it simple, let the kids play, create something beautiful together... This led me to Don's collaborative lesson.  


Here is the deal... I believe that we build off from each other's ideas.  You will often see me highlighting other educators and Artist who have inspired my lessons. I'm sure it's never taught the same, or with the same emphasis, or even materials... That is why we share our ideas, to see where the seed can grow. Don planted this seed and over the years so many people from all over the world have planted that little seed into their own communities and classrooms. LOOK HOW IT HAS GROWN!!

I also believe that if you are going to use someone's lesson, share your tips and tricks with others too. So, here it the slideshow that was presented to my students (K-5) to teach this lesson. When going through the slideshow, you will see our inspirational Artist, Libs Elliot, as well as Don Masse and the links to his students' work. My students would ask me, do you know Mr. Masse, after I had introduced him as one of my BFF's. "When do you see him?" "How can he be your friend, he lives so far away." This was a great opportunity to talk about how I learn from educators and Artist all over the world. They would also ask, "Will you take a picture and show your friend?" Will I? Heck yes! I'll also share it with the whole world if you don't mind. 


Here are a few additional tips and tricks. 


I used the best paper cutter EVER. Every time I put this out there I have people ask... Where?? How?? I need one.  I get it.  I had to cut the white paper with my own 'traditional' paper cutter and it took me, no joke, 4 times longer.  So, yeah... get your self one. They ROCK! (click here)


When I was creating this lesson, I wanted to check off the list that I had reviewed with all my 3rd-5th graders how to glue with a glue stick and white glue. With my 2nd graders, it was an introduction to white glue... and with my K's and 1st graders... we used glue stick only for this lesson.  The 4th and 5th grade would laugh when they heard how I presented the instruction of the glue stick in my YouTube video... I would joke and say, "I know, Right? Well, this is how I teach my littles. You can teach little people in your life in the same way." They would all laugh and think that this was a good idea. But really, many of my 4th and 5th graders are still working on this skill of gluing and all the little tips and tricks really help. 


I had placed a tray at every table with the extra paper. They would put their scraps in there and I would add some little papers here and there. It allowed for the rainbow effect that you see on the wall. I would only divvy up certain colors at a time. The trays also had the scissors and glue in it so it was easy to pick up.  At the end of the day, I would go through all the trays and clean up the paper sheets and get it ready to go for day 2... then 3 and all the way through the 6th day of my digital day rotation. 


For my littles, I had them practice cutting a triangle together. It was many of these kids first day EVER in school (or in my art room) so we really broke it down... "Here is a square, everyone turn it and show me a diamond. Great, now pur the top corner and the bottom corner together.  Now press it down on your table. Now, what shape do you have??" They would call out together, "A triangle!" I love the wonder and enthusiasm of K's. 


I never said, "You're Wrong". See this is the first day in Art Class for these buddies... If a student didn't 'follow the rules', I would let it go. This was not a formal assessment, they will all look amazing on the wall, and if the kid is proud of their work, so am I! 


I would ask students to arrange their 'mini' quilt on a table when completed. This would give the work a little dry time and allow me time to arrange it on the large format after the students have left. This way we both got to practice our composition. As you can see below, I measured out the paper before attaching the individual sheet. I also numbered and marked it for the connecting points so it would be placed upon the wall correctly


I took some training on a practice called ENVoY this summer and I started implementing it right away. One of the practices of this is to have the directions posted on the board.  I'm sure there will be a LOT more writing on some of the ENVoY tips and tricks but in the meanwhile, check out their website


Because kids in the Art Studio have different times that they finished up (Art is an hour long at my school), I was sure to have some 'play' available. I had blocks, toys, cleaning tools, books, and free draw. Only some opportunities were 'opened' depending on the time left in class for the students. 


I had the quilt slowly growing over the last two weeks... this allowed for everyone to see the progress of the Art Project. 


I shared my lesson plan slideshow with my staff. This allowed them to understand what we were doing in class and what to expect.  It gave credit to the Artist, Libs Elliot, and the inspiring teacher, Don Masse. Plus, it gives others the opportunity to collaborate with you... as you see here, a coworker and friend of mine brought in a quilt that her grandma made and she shared it with her students and myself.  It was awesome and filled my heart. 


I labled the work and tried to educate more people with some little tidbits on Libs Elliot and pictures of her work. EVERYONE that uses the school (sports, scouts, and so on...) is in this area of the school at some point.


And yes... I took a picture with the Artwork. I was so proud of getting this done, up, and displayed! It was a big job but yep, I celebrate my students work too... That called for a picture upon completion. 


Friday, October 28, 2016

Frida Faces


Hassan Elementary is now just wrapping up on Frida Kahlo as our featured Artist.  She was a blast for our students to learn about.  So much fun in fact, she was studied for three visits to the Art Studio. 

Week One:

In the last 5 minutes of class, students watched a Bit-O-Bio on Frida. (click here to see the Bit-O-Bio). I am amazed how much these students picked up on all the facts about the Artist from these little snippets of Art History. They look forward to the Bit-O-Bios.

Week Two: 

I showed students a slide show of some images of Frida.  This is the first half of the Google Slides below.  I talked about her dress, her lack of a smile, her marriage to Diego... All of this being the Elementary safe version of course. 


Week Three:

The second part of the Google Slide is filled with images of Frida's work.  We talk about the 'secret codes' (symbolism) that Frida puts into her painting.  We discuss how she can tell us a story without putting words in her work.  The strongest image for this was Frida as a wounded deer. EVERY class understood that Frida was in a lot of pain in her life and this represented that.

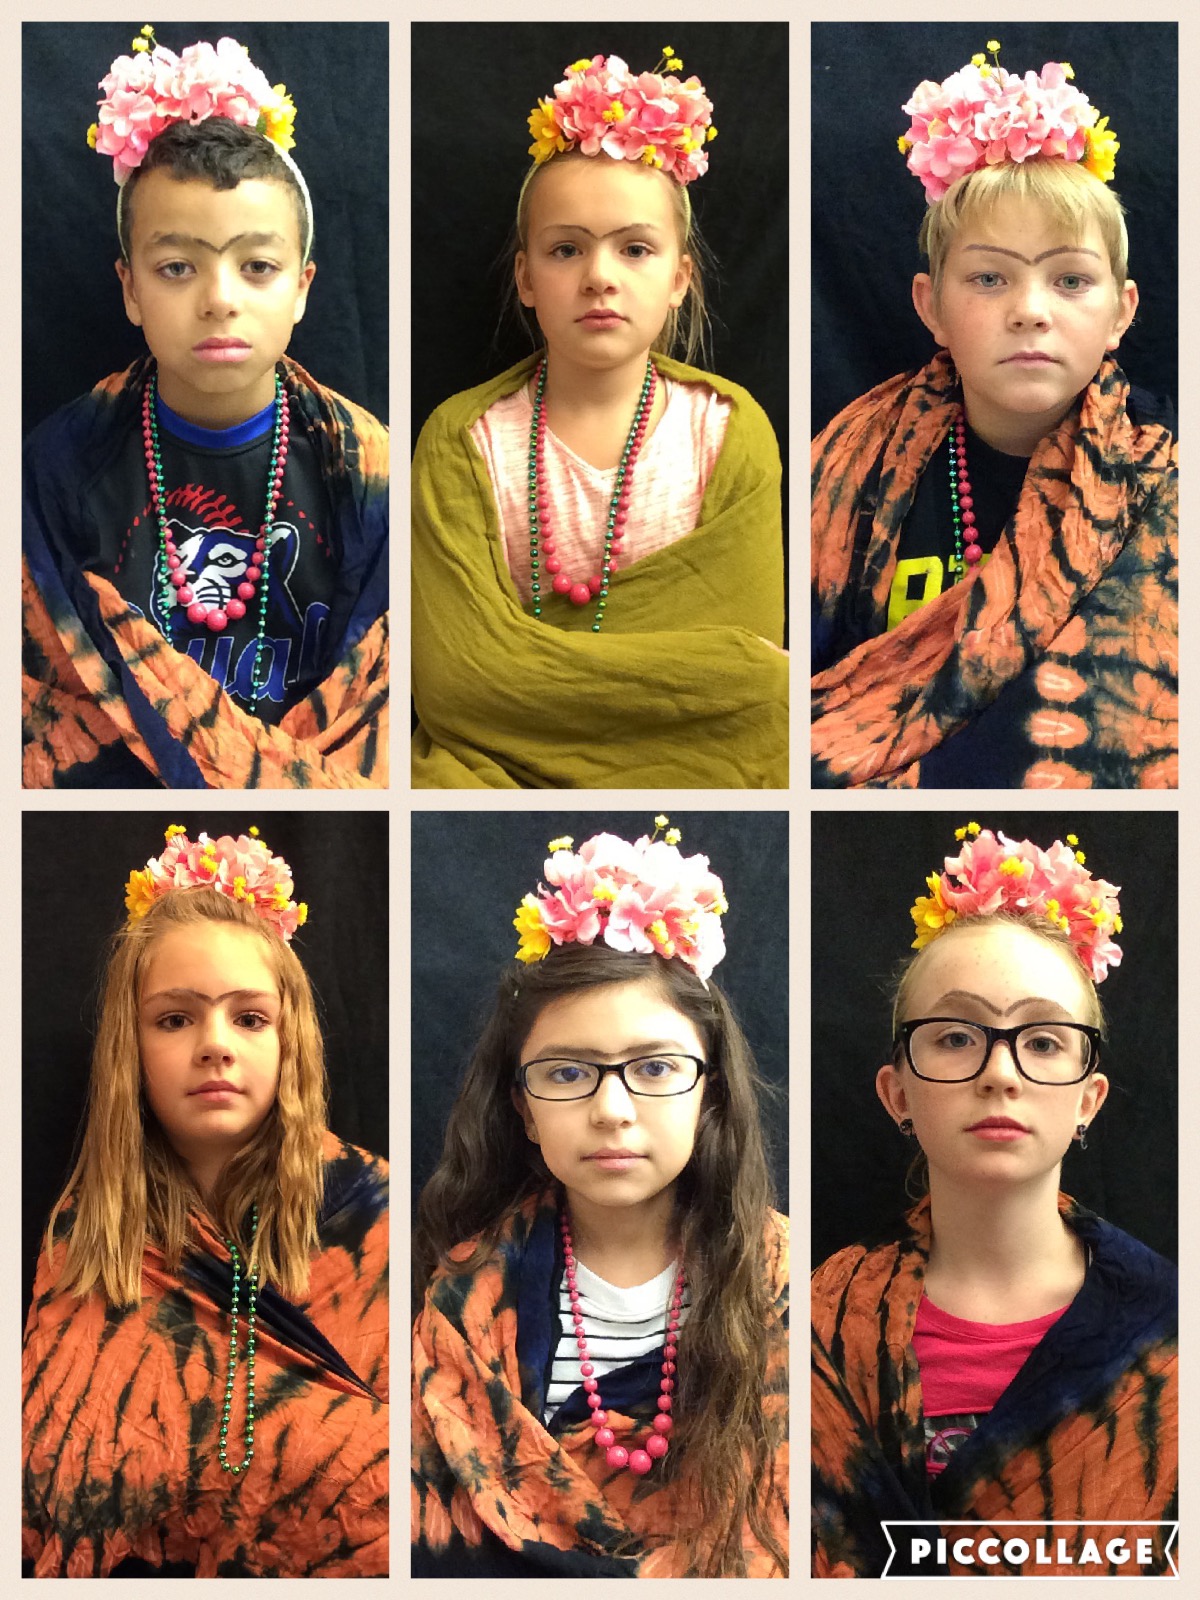
As students were working, I also allowed them to get their 'Frida' brow on... if they wanted.  I was shocked to see how many students wanted me to draw an eyebrow on their forehead.  They loved it, held their Frida pose and I took a picture to share with the families of the participating classes. 


As you can see I had the iPad in a stand... a black sheet draped behind them, and lot's of props for students to choose from.  Many of the students left my room sporting the eyebrow for the rest of the day.  The pictures actually turned out stunning.  Boys and girls enjoyed this opportunity and as I mentioned... This was only an option, not mandatory. 


I have also decorated the classroom with a Frida Pumpkin. All the kids have been able to identify her as they walk in.  I guess it's kind of a formative assessment. 


My lesson plans allowed me to do this with mostly the 3rd and 5th grade this week.  Not all classes had the opportunity. 


If we were pressed for time, I simply drew the brow on the kids and took a group shot.  I explained to parents what they were doing in a short email home.  I got lots of positive responses from parents and teachers.


The other Artist we have studied so far this year is Bob Ross (click here for his Bit-O-Bio).  What a great combination of Artist.  We first have Bob with his 'Happy Accidents' and cheery demeanor. Then Frida with her subdued face and thoughtful symbolism.  I am having parents and students reporting watching the 'Joy of Painting' all the time.  I think it's so fun to get the kids pumped for Art History. 

Thursday, July 21, 2016

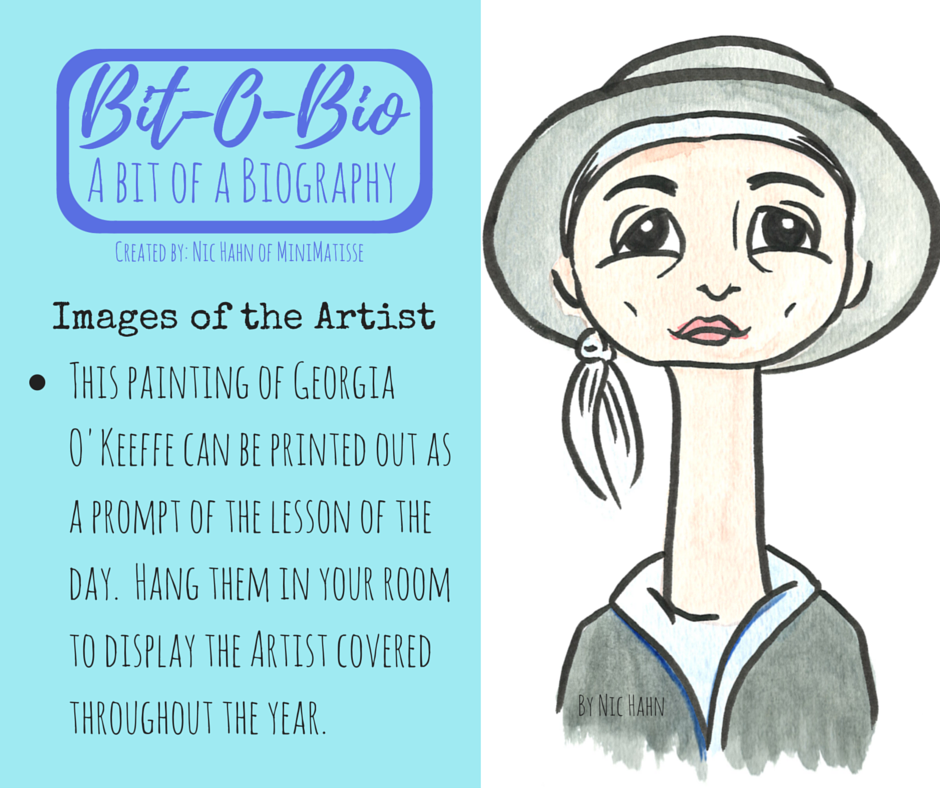
Bit-O-Bio, Georgia O'Keeffe


Here's a little Hahn history... I failed Art History.  I can remember stories and images, but for Pete's sake... I couldn't remember who and when... and never had a gift for spelling. So, take two, Art History the second time around got me a solid 'C'.  That is why this project is so important for me. I want to help my students be more excited about art history than I ever was.


So far it's working for me.  I have fallen in love with every artist that I have researched.  Georgia O'Keeffe was so fun to study.  There are so many films about her and even better... WITH her.  She's was the one explaining her philosophy, her thoughts, her struggles.  I love finding the big messages for these artists.  Not the drama, and scandal... just the heart.


Some of the big ideas from Georgia was that she wanted/needed to create her own art... not copy someone else.  She found full inspiration from nature. She was truly in love with nature, the flowers, the bones, the shells... it all represented life. She was happy because she did what she loved.  Big ideas, right??


And so I present to you my 3rd Bit-O-Bio... 
Georgia O'Keeffe (click here)


Sunday, June 26, 2016

Bit-O-Bio, A Bit of a Biography


I'm so excited to introduce my newest adventure.  I'm calling it Bit-O-Bio.  This is going to be my new 'Moster Medium' or '#ProcessPigs'... This year I'm concentrating on Biographies of Artist.  What do I mean by all that... Let me share. 

Several years ago I gave a presentation at the AOE (The Art of Education) online conference on Monster Mediums in my classroom.  Feel free to view it below but basically, I wanted my students to know that the word medium means "materials used in an artwork".  I would introduce them to a 'monster' hanging on the wall every week. Then the kids would guess the medium of the monster and because this was our daily warm up, every student was able to use the word medium in their normal vocabulary by the end of the year. 


I did the same thing with Process this last year.  Check out any of the many videos of #ProcessPigs that I created. Students K-5 were able to talk about the 'process' of their own artwork in a sophisticated way by the end of this year because it was part of our daily 'cool down' in art class. 

This next year I'm tackling Art History... As you might have caught in the video above, this was part of my long-term goal.  If you have been watching my Instagram account, you know that I'm working on these paintings of Artist.  They are my own style and I'm loving ever minute!  I plan to create a video for each artist.  These videos are going to be 2 to 4 minutes long giving some highlights of the artist life.  I will be hanging the artist image in my classroom and each week as the students come in, I will have the video play at the start of class. As a wrap-up at the end of class, I will quiz students about what they have learned.  

I have just completed my first Bit-O-Bio, A Bit of a Biography.  Of course, I had to do it on Bob Ross... anyone who knows me, knows I love this dude!  In the past, I have been asked if I would sell my Monster Mediums or #ProcessPigs... I would love to, but I would have to quit teaching to make the beautiful works of art.  This time, I have made my images and videos digital so I can share them with anyone else who would like to implement a little more art history into their classroom.  I will be adding new artist throughout the summer.  I am selling them on TpT (Teachers pay Teachers).  This is what you will get if you buy a Bit-O-Bio.


I have made a video introducing the artist. This is a short 2-4 minute video with kid-friendly language. It highlights some 'kid-interesting' facts. I draw the story in the recording so it kind of shows drawing process as well.  

I took a picture of the key images and formulated some review questions.  My plan is to show the image to my kiddos so that they have a visual prompt as well as a verbal question. I will give these as students are lining up, or maybe for a brain break.  I plan to also have these posted outside my room for teachers to use as they line up to come into the classroom. 


The images are what have been feeding my creativity this summer. I love the fact that I have been able to think about these great Artist, research them, and create a simple explanation to share with my students.  The process of these paintings has been so much fun because I'm learning how to use photoshop yet I am still being true to my hand skills with watercolor and drawing.  I also feel that I'm being true to my 'style' of drawing.  I compare these artworks to ones I did even in high school and I see lots of similarities. 


So, check it out!  I hope you can use them, and if not, I'm having a blast getting ready for my student this fall! 

Friday, March 13, 2015

Tints, Ice Cream Cone


These are not new... This idea of creating tints and turning it into an ice cream cone is not a new one... in fact, when I type in tint ice cream cone into google, there are several wonderful examples.  These cones were forgotten when I was posting about my featured artist of the year, Wayne Thiebaud (click here for more on the featured artist).  This is the project that my 3rd grade did and THE LOVED mixing paints.  It was fun to see them so excited about making these treats.  The one thing I did differently this year was I added a woven cone.  This gave the project some challenge, but nothing they couldn't handle.  This is a repeat because of the simplicity and the directness to the concept. 

Wednesday, March 11, 2015

Torn Cupcakes


This was the 1st grades cupcakes created under the inspiration of Wayne Thiebaud. This project was also inspired by a project posted on For the Love of Art.  I loved the look of this project when finished, but I don't know if it was a repeat.  I like to have 90% of my students be successful with their project.  One of the requests of this project was to make it represent a cupcake.  There were quite a few who got caught up on the collage part of the cupcake building and lost track of the representation of a cupcake.  None the less, most students enjoyed this one.


This is the video I used to help with this project.  Feel free to give it a try.

Saturday, February 7, 2015

DJ Mix's Story is in!


The stories are in!!  A couple weeks ago I asked students to take part in a writing challenge.  There was a small percent of students to participate (in fact .03 %), but that is fine.  I wanted it to be an enrichment for students who love to write.  These stories are so dang cute!  I loved reading them.  Thanks to all the kids who wrote.  

Friday, January 30, 2015

Selfie Station!

This was a blast and a half!  When the kids were in to make their cupcake (see previous post), I set up a station for the kids to document the day.  It was a very popular station.  I had so much fun looking through the images that the kids took of themselves.  I really enjoyed seeing the 'quiet' kids make a silly face.  I laughed the whole time as our 1st grade students took their pictures.  It was a great station for the kids to 'share' their artwork with others. 


I plugged all 350 + pictures into this 3 minute video.  You really get a feeling for the excitement of the last 6 days in art class at Hassan Elementary.