Showing posts with label STEM. Show all posts

Tuesday, March 13, 2018

Art Ed Blogger Network- STEAM/Arts Integration: Growing a Bean


Kids are fascinated with nature.  They love seeing how things work, change, interact and grow.  
Watching a seed change takes time but can become a great early childhood lesson.  
Growing a bean in a bag would be a lesson going on in the background for several weeks but
the ever-changing seed will be visited several times throughout its morph into a plant guaranteed!


Observation is a huge part of this lesson.  Students will be observing and drawing the ever-changing bean
in the many stages that it takes.  Before starting the germination process, students should observe and
draw the seed. You could use a sketchbook or worksheet.  Once the first observation has been made,
it’s time to ‘plant the seed’.

You will need a dry bean, a plastic bag, and a moist paper towel.  The paper towel is placed into the
bag flat and the bean placed in the middle of the paper towel.  You want to make sure the bean is
‘floating’ in the middle of the paper towel rather than laying at the bottom of the bag.  In a classroom
setting, I would encourage you to allow every student to grow their own bean or at least start several
beans.  There is a chance that some of the beans might rot, so it’s good to start several. It’s also
interesting how each bean has a different timeline for germination.  Place the ‘bean bags’ in the window
with lots of light using painters tape.


After several days have the kids move to the window, or carefully remove the bags to bring to their desk.  
They can do their second observational drawing This time they might note the changes in the bean
shell, or perhaps a little poke of the root.  They might even discover mold growing on the paper towel
(this is part of the process, so no worries about that). You will continue to visit the beans as a class every
couple days, but let me tell you, the baby plants will be looked at more often than that.  I’m amazed at the
high interest this low tech project receives from kids.

There are so many facets to this wonderful lesson.  Students will come away with an understanding
of the several stages of a plant.  They will see and document the many stages that we normally can’t see
because it typically takes place under the ground.  This lesson closely relates to Science curriculum and
can cross over to other subjects as well. Students could do math problems or graphs by counting the
number of roots on their seedling.  They could write about the stages of the bean in a nonfiction way. The
lesson could be a jumping off point for many other Art projects.  This is a rich lesson that will teach and
encourage curiosity and lifelong knowledge.


This is a lesson I'm bringing back into my classroom this year (if time allows) but I originally posted
about this lesson several years ago when my mini Matisse was truely MINI... She is now 10 years old and
has successfully graduated from speech therapy... What a sweety she was (and still is). This video could
be a great example of how your students/child could document the process of the beans. Using an app
like Seesaw would allow students to be more independent with their documentation of the growing process.
It could also allow your students to learn from another child which is always engaging.


Monday, October 30, 2017

Double Yourself: Using Panoramic Images to Double the Subject in a Photo


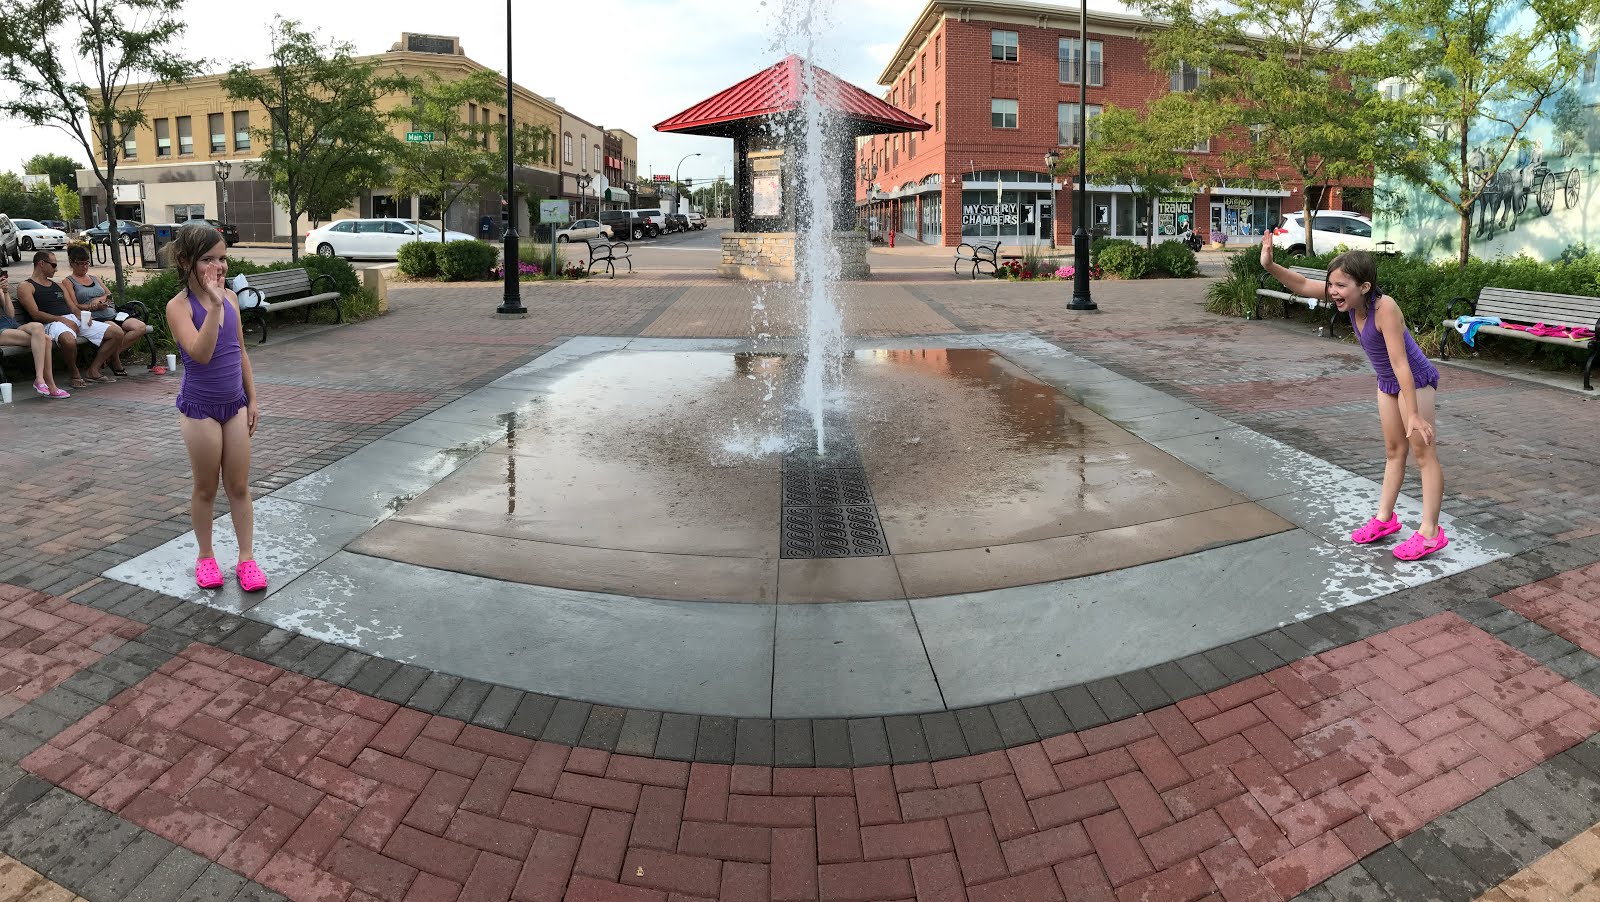
Double yourself was a fun project that my sister told me about.  She mentioned that one of our mutual friends had been taking pictures of herself, interacting with... well... herself. I had to give it a try. Our two families went down to the park to give it a try ourselves. This was a TON of fun!  Here's how we did it...


Can't wait to see what our classes come up with. If you use this activity, please tag me on it Twitter @MiniMatisse or Instagram: @MiniMatisseArt. OK... Let's just look at some of the awesome shots we got doing this project.


Thursday, October 12, 2017

Symmetry Game


Often in Art there is crossover of content.  Many times when I'm teaching an Art concept I hear the kids exclaim "We learned that in (Math, English, Science...)". What a wonderful thing to have your students eyes light up and connect the dots that education isn't in departments, even if many of our schools are set up that way.


As I introduced our new lesson to the 3rd grade about Symmetrical Dragon Heads, I warmed the students up with a quick game that gets their bodies moving. When the students exclaim... We know what Symmetry is! I ask them to prove it with a partner.


The students are laughing and laughing as this quick little activity warms them for the concept about to be covered in the Art Studio. I offer to take the picture of anyone who would like to have it, and we get into learning how to create symmetry by cutting paper. (play video from the start to 2:20).


We finish up our first class period by creating several dragon heads out of scrap paper from the copy room. They choose one that we will start with for a pattern of our final artwork for our next class period. 


Overall, this is a fun day for my students revolving around the shared concept of symmetry.

Sunday, April 9, 2017

Art Teacher Swap-- Sphero


This is the third Art Teacher Swap that I have done, the second at Rogers Elementary with a good friend of mine, Sue Davies. Read more about what we have done in the past in these posts (click here).  I'm going to be sharing Sue's amazing clay projects that she has done with my students in upcoming posts, but this post is about what I did with the RES students this year.  I brought in Sphero to the Art Room.  You might think you are having a little Deja Vue... that might be because I did this at Hassan right before Christmas break.  I was excited to share the Sphero's with another 800ish kids.


Here are a couple things that went really well this time around.  I asked for volunteers!  This was so great... I had the opportunity to meet not only lot's of students but also lot's of parents. They were all really engaged in the activity too. They also were taking pictures of the kids at work and sending them out to more parents.  That's right... Arts Advocacy, a positive message coming out of the classroom.  It was a highlight. 

So by the end of this week, I had taught 1600 students in total how to play with the Sphero.  They also all had a chance to actively use them.  I had taught the lesson 60 times... wait, I guess it was 59 times, I don't want to exaggerate.  So, yeah, I have a few tips and tricks to share if you are considering this lesson in your classroom.


There are a couple of ways to learn more about how I taught Spheros in my classroom.  First, look at my past posts (click here). You could also download this handout for quick and more specific links (click here). But if you are jazzed about Spheros as a great STEAM activity... Education Closet Summer Conference is the place for you.  This online conference is AMAZING!! I have purchased several times and have learned so much!! This summer, July 20th specifically, I will be presenting on Sphero in the Classroom. I will be sharing a ton of nuggets I've learned from teaching this lesson this year. I'm so excited to share.  Hope to see you there!!

Sunday, February 5, 2017

Resource #Crush


February 5th: Resource #Crush

This is my pick this year for a good resource, Get Into Art, Animals by Suzie Brooks.  I am a digital teacher.  I love to go online and find inspiration there.  I look at Pinterest, Instagram, Facebook... Digital is awesome!


I also am a library geek.  You can find me at the library at least 4 times a month.  I walk the Art sections, the books on CD, the music, and Children's books.  I look at the magazine and the DIY sections.  All the librarians know me, and my kids. That is how I found Get Into Art.  My daughter was actually looking at a book about Matisse (her name is Matisse, it's a subject close to her heart) and I saw this book pop up.  We requested it on her card... and since then I have had to pay a fee because I brought it back late.  I kept looking at the layout and the lessons.  I'm excited to say this book is a series, I have them all on imy Amazon wish list.

What I liked about the lessons in this book is they are inspired by a famous work, but also under a flap, there is a short lesson.  The lessons are with a variety of mediums. My kids were able to use these mini lessons easily on their own.  I think this would be a great book to have in a TAB classroom for inspiration.  I used one for a recent lesson for color.


Before I started the next part of my lesson, I had to do a little research on the pronunciation of Joan Miro.  I hope this Minnesota girl got its right... 


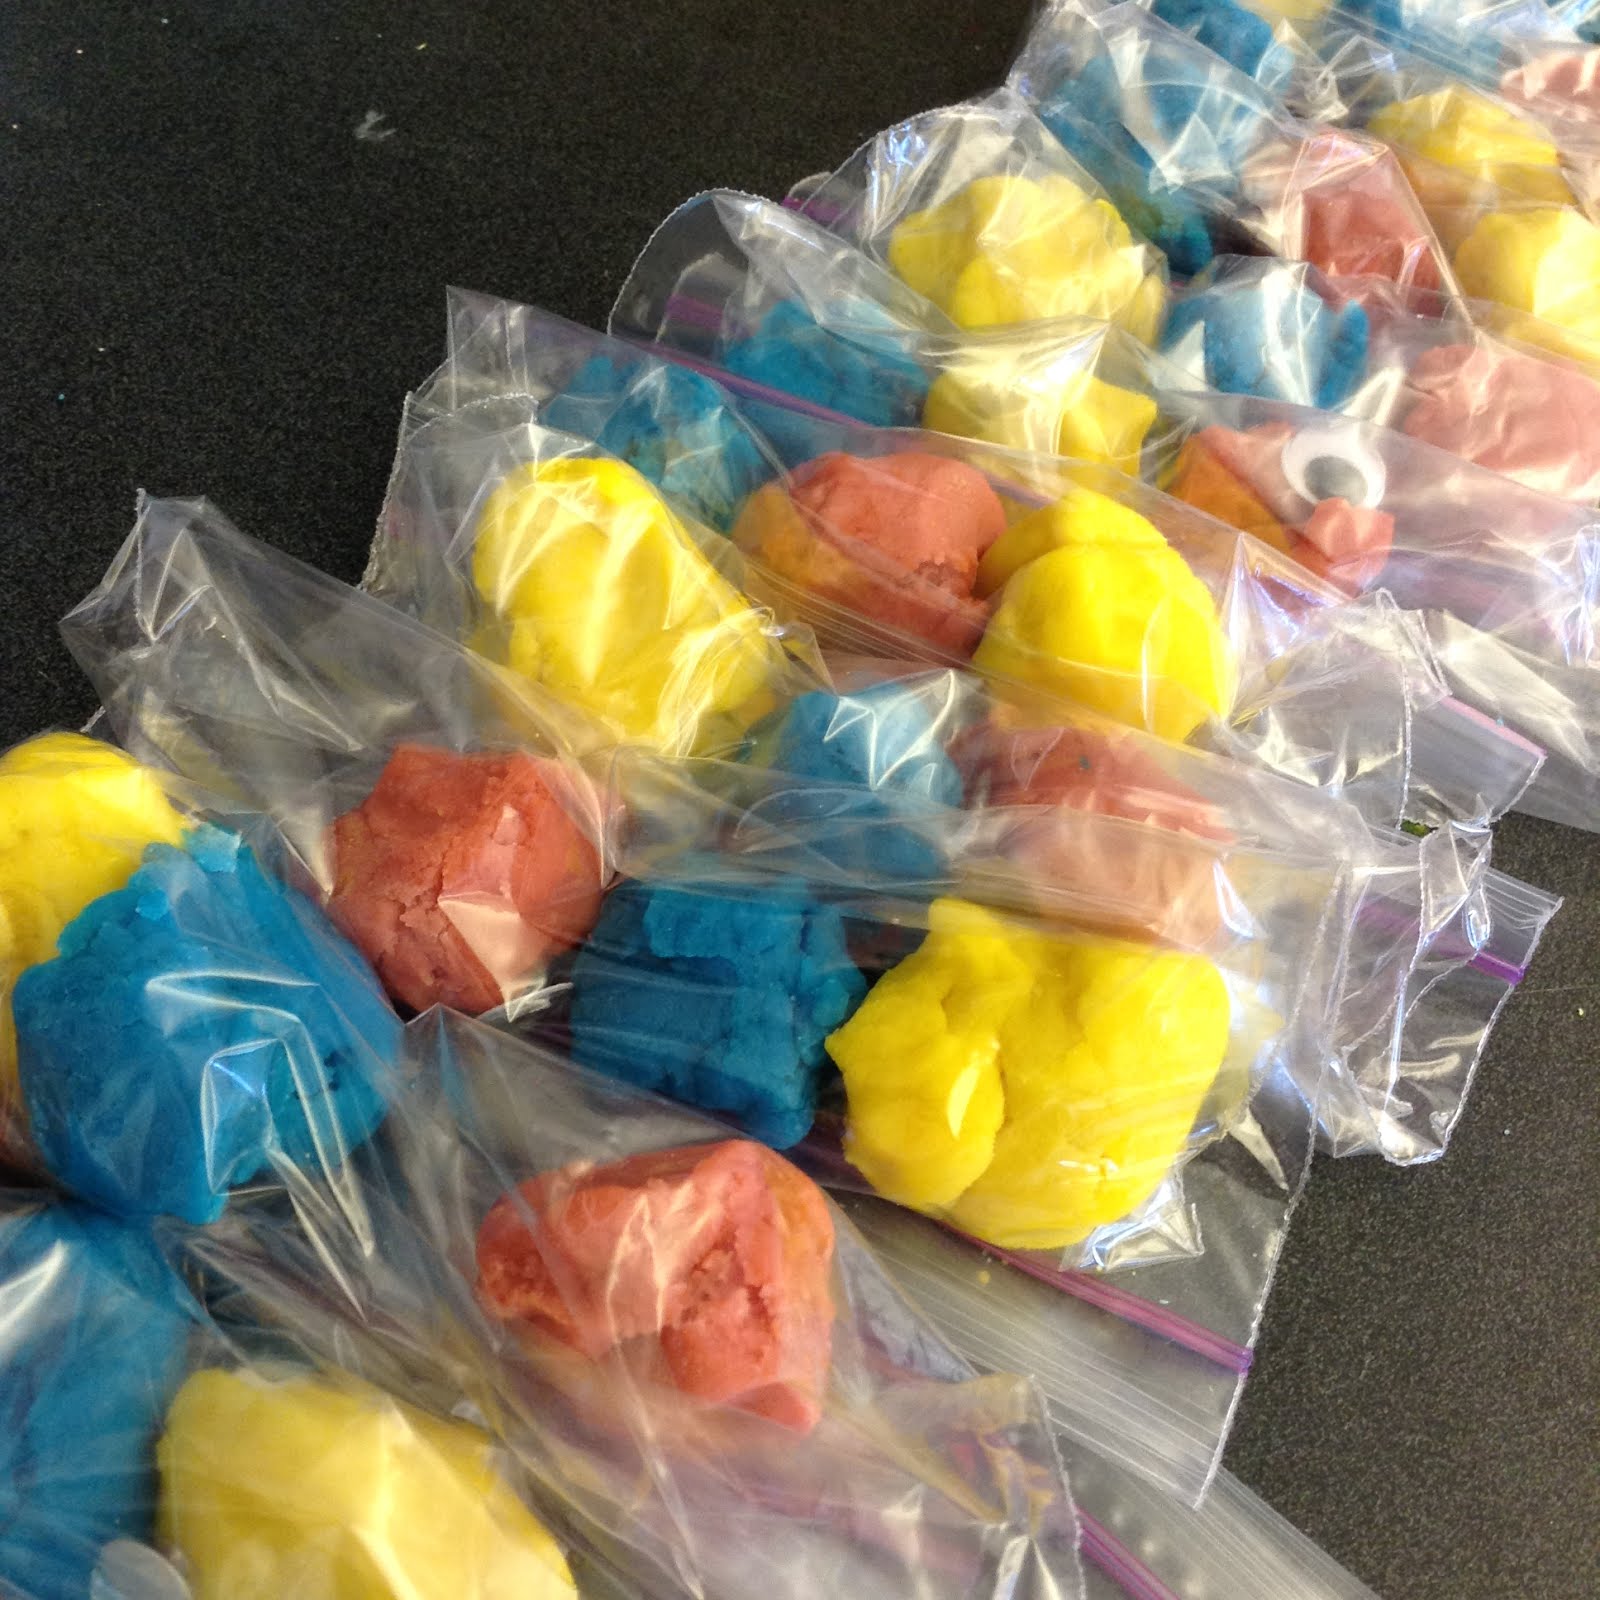
The kids had a BLAST with this lesson.  I acquired the playdough by asking parents to make it. I simply put a Google Doc on Seesaw and the sign-up sheet was filled up quickly. All students were able to walk out of the class with a little pack of play dough to take home, complete with two googley eyes.


In class, the students had a blast creating these creatures. This was all thanks to the book Get Into Art.  These creatures were a new idea for me and my students are so happy to have made them. 

Monday, January 2, 2017

A Complete Guide to Introducing Sphero into the Classroom


I have posted a lot about or experience with Sphero in the classroom.  It was so many posts that you might have missed one.  I have created a FREE document on TpT that will allow you to a complete guide to introducing Sphero in the Classroom. Click here to download your free guide complete with links. 

Saturday, December 31, 2016

Sphero- Pros and Cons


In this past week, I have shared so many reasons why using Sphero in my Art room was an amazing experience. That's what this blog is all about, CELEBRATION of the great things that happen in the Art Studio.  However, this blog is also about the reality of Education and Art. Know that this post is not to cut down on the products of Sphero, but rather to help other make informed decisions. Is Sphero a good choice for your classroom?

I put this image on social media on the last day of Sphero in my classroom. Cynthia Gaub wrote a message that has stuck with me.  She said. 

"Wow, those are expensive! That cart is over two years of my annual art supply budget."


When I stopped to think of that in these terms, I realized that the cart was about the same as my yearly budget as well.  I'm given a goal/budget every year but if there was something I really wanted, I always have can go to PTO and make a request.  Our parent group is wonderful at fostering the passions of the teachers and staff.  They know if the facilitator of the project is excited and the many students will benefit, it's worth it.  That is how these were funded.  Alysia Caouette, our Tech Assistant at Hassan Elementary, brought the idea of Sphero to our PTO, they saw the passion and made it happen.  I was lucky to be able to bring this amazing device into my classroom because of her passion and the support of the PTO.

So yes, expensive... but if you are in a school that can financially support something like this, we think it was worth it. 

Another thing to consider is the battery life.  For every one hour of play, the Sphero needs three hours of charge.  That made it hard to use them all day long for all of our classes.  We made sure to only use half of the Sphero's at a time to allow the other half to charge. 

You need a device for every robot.  I was amazed how actually the iPads we were using spoke to the correct Sphero.  We were using an old generation of iPad as well.  Our concern when starting is this app might crash the iPads but it didn't.  It worked really well. 

As you can see I have a lot of space in my room.  For the station I set up, this was helpful.  However, anyone can be creative with this.  Explore your space, where can you shift furniture, what hallways can you use, use under the tables... It's amazing where you can 'find' space when you have a want to do so. 

Big pro of the Sphero is the engagement.  EVERY student was excited to give this a try.  The energy was SOOOO high for the whole week. A suggestion to any facilitator is to get lots of rest, have high energy yourself, and maybe enlist a couple of volunteers when rolling out this robot to your classes. It helps to have some extra eyes and hands to help students. Maybe a have older kids helping little ones, or parent volunteers, at the very least place, students in groups so they can troubleshoot together... It got to be a bit much to teach this to 25 plus kindergarteners at the same time.

How did I know it was totally engaging?  We brought these Sphero into the Art room the week before holiday break.  MANY, MANY students changed their request for Santa to be Sphero... so sorry to all the parents and to Santa for the sudden and last minute gift wish change, but... don't you think that shows engagement?

I did take the time to share with all my students that Hassan has these for them to use, learn and play with, so it's really OK if a Sphero was not gift wrapped for them this season.

Friday, December 30, 2016

Sphero: Tips and Tricks


I celebrate failure.  I mean, might as well right?  Failure is going to happen. Let's just say, if we are celebrating failure with this lesson, there is a lot to celebrate.  As a specialist, I have the advantage of teaching the same lesson over and over.  I have four sections of first grade, and six sections of third grade and so on.  The last day I teach the lesson is ALWAYS better than the first day. That is one thing Alysia, my Sphero partner, and I embraced right away! After every class, we analyzed what we would change to make better for the next class.

Tip #1: Expectations

Allow students to help with expectations. This was a very exciting day for every class.  It was good to ask the students what they thought would be some good rules for the day.  They all came up with the following.  Have safe bodies when moving around the room and care for the technology. We would add that their hands must stay out of the 'arena' (that is what we called the frames) and they should not touch the Spheros.  We explained that our goal is to learn to drive the Sphero, not pick it up and move it.  It was posed as more of a challenge than a rule.  We also determined a consequence of sitting out for one rotation if these suggestions were not followed.  

Tip #2: Teach them the app


In the above photo, you see Alysia teaching the app to the students.  We reminded the students that our main goal today is to learn how to drive the Sphero.  That means we are going to limit what parts of the app they should use. Here are some of the tools in the app that we 'opened' to our students. 

First, they MUST find the tail.  The tail is a LED in the Sphero that allows it to be orientated.  The tail must be pointing towards them.


Next, the speed. We asked the students to keep the speed to 50% or lower to best learn to drive the Sphero accurately.  The only exception was at the water station where they could crank it up to 100%. 


We showed them how to change the color.  Alysia always did a great job of asking students why we should change colors and students always figured out that it was to allow them to identify their Sphero next to all the others.  Plus in the Dark Room station, it was fun to see all the colors of a Sphero. 


Then the joystick.  We showed them how to drive the Sphero with the joystick.  There are other ways to drive, but we wanted the students to experience this way on their first try with the Sphero. 


There are going to be mistakes.  Students would sometimes hit a mission or end up in a spot we asked them not to be in.  We showed them the arrow to go back to the regular tools that we showed them.


Tip #3: Pointer Finger

We found that many kids wanted to use their thumbs to drive on the iPad (thank you very much cell phones).  This didn't work well, especially for our littlest students. After witnessing this struggle, we made the suggestion of using only their pointer finger. This helped a lot! 

Tip #4: Roleplay

For our youngers, we would do a 'fish bowl'.  This means we would have myself and two other students demonstrate how to share the iPad, how to pass it, how to use kind words.  Modeling first was perfect for this situation. 


Tip #5: Adapt for Age

For our 3rd through 5th-grade, we would give all four stations.  They would be with one partner (of their choice).  It took us about 15 minutes to demo the app and go over expectation and then at each station we would give each partner 3 minutes to drive. This took about a half hour with transitions. That gave us enough time for a picture by the painting and a conversation about 'What is Art' and if what we did today was art.


And then there are the Kindergarten through 2nd-graders.  Well, that's a little different. Especially for the K's it was more beneficial to have two people helping. We only place them at two stations... the 'Trick Station' and the 'Painting Station'. We would have them in groups of 3.  They would drive for one minute.  Each adult would take a station and troubleshoot, and foster sharing between the teams.  We set the time for one minute for these younger students.  They did a swap of stations to allow each student to experience the painting. This maybe lasted 20 minutes and the littles were ready for something different. That is when I would take the kids over to the water station and I would ask them if they think Sphero is waterproof.  Then we would explore the Sphero at different speeds.  Then it was a quick switch to around the 'trick' arena again where Alysia would show students the pre-programed codes that Sphero has.  Sometimes there was still a few minute.  I would talk to the students about Jackson Pollok and show them a short video about his work (click here). Any of you who work with this spread of age groups knows you really need to adapt to each grade level. 


Tip #6: Use a Timer

There is so much going on in the classroom that a timer displayed on the projector is quite beneficial.  This allows students to see how much time they have as well and the whole class to hear when a switch needs to be made.  As a facilitator, this is so beneficial because I was sharing things on Seesaw, documenting pictures, troubleshooting, pouring paint and so on... so it was helpful to have a running timer.  For the 3 minute intervals, we would set a google timer (click here) but for the younger students, we would use continuous timer found on Youtube (click here). 


Tip #7: Don't Add Too Much Paint

Soooo, you would think you should have all your kinks out of the way after doing this for four days... Nope... I messed up.  I was so excited about the paint colors that I choose on day four that I started to add too much paint at a time.  Yep, I'm owning this one.  As you can see the paint got too wet on the paper and it started to rip.  We have found that adding the plastic bag that holds the globes of paint, to be placed away from the edges and the paint to be added in small globes.  Give the paint time to dry whenever possible. 


Tip #9: Keep them Charged

Whenever you can have the Sphero on its charger, you should.  We learned through failure that to run a 5 hour day, you must have these on their charger whenever it's not being played with.


Tip #8: Promote and Celebrate

Make sure everyone knows what is going on in your room.  This was an experience that many of these students would have never had.  Make sure you share this in newsletters, on Seesaw, online... Celebrate, share, and promote the amazing things you do in your classroom!!