Showing posts sorted by relevance for query seesaw. Sort by date Show all posts

Thursday, September 22, 2016

Digital Portfolios- Seesaw


Part of an art teacher's job is to make sure that their student's artwork is displayed.  Brag about the happenings in your class.  Show students that art should be shared beyond the classroom walls. In the past, that meant that an art teacher would line the walls with beautiful art to show to the rest of the school.  This is still a practice that many of us do.  However, many art teachers are looking to make the viewers of their classroom’s art be shared beyond the school walls.  Using social media is one way to do that… another way to share art is through Artsonia, Seesaw, and or Creatubbles.

Using apps to share art is HOT right now. How does an art teacher choose what platform to go with?  We thought we would help with this question.  I will be sharing about the app Seesaw in this post.  Hope Knight, author of Mrs. Knight’s Smartest Artists will be sharing about Artsonia. Tracy Evans @EvansArtHouse, Matt Grundler @Artguy76, and Beth Carter @Bacarter77 and It is Art Day will be sharing on the web-based tool, Creatubbles. This Creatubble team is art teachers from Texas who just happen to be valued members of my #PLN (Professional Learning Network) on Twitter. Beth Carter will be highlighting their take on Creatubbles posting on her blog, It’s Art Day.

I learned about Seesaw two years ago.  It perked my interest the minute that I heard of it.  I love that this app was so quick and easy for everyone to use.  I mean everyone… the teachers, students, and parents.  I talked my specialist team into giving the free version a try last year focusing on only our 1st grade students.  This year our whole district, Kindergarten through Second Grade is a ‘Seesaw’ school. Now we are all, homeroom teachers, specialist, and special ed teachers learning together to use this tool for communication with parents and admin, as well as assessment and documentation.  Let me break down this app for you a bit more.

Seesaw is an application that allows parents to see real-time (or almost real-time) information of the happenings at school throughout the day.  Teachers will start a 'class' on Seesaw and invite parents to get an app on their phone.  Then when items are posted to the app, parents are informed with a notification that their student (or teacher) has shared something on Seesaw.  It is private between the student and the guardians.  Teachers and co-teachers such as Specialist, Special Ed, and Administration also have access to the submitted work.  This allows the whole team to view the work of the students and in our teams case, has allowed for some amazing collaboration!

My favorite thing about Seesaw is how easy it is for very young students to use on their own. Once trained and with some practice, students start sharing information about school on Seesaw without prompts.  This means they are empowered to tell their parents about the learning going on at school.  Teachers can change settings to authorize the work that is being sent home to parents as well.  This is a great feature because teachers can comment on the work, have a formative assessment or even a summative assessment before giving the OK to the app to send the information to the parents.

I also have fallen in love with the support Seesaw gives to their users. They are on Twitter and post new ideas all the time @Seesaw. They also have an amazing Help Center on their website with lots of resources such as videos and webinars. They also have Seesaw Ambassadors who are all over social media sharing what they are doing with this app.  One of my favorite to follow is Angela Gadtke, @MrsGadtke on twitter, she is working hard to show educators the many possibilities to this app.


I have posted about Seesaw before and will continue to do so because I am using this tool inside and out! Click here to see support post about Seesaw.  I am a Seesaw fan.  I choose to focus on using this app more than ever this year because our district adopted it in such a BIG way with all students K-2 at ISD 728 having an account this year.  Last year I researched Creatubbles and Artsonia... Both are amazing apps and serve some of the same purposes, however, also have some different features that might be more appealing to the needs in your classroom.


Hope Knight, author of Mrs. Knight’s Smartest Artists will be sharing about Artsonia on her blog. Click here for a link to read the many great capabilities of Artsonia in her classroom.


Also, Tracy Evans @EvansArtHouse, Matt Grundler @Artguy76, and Beth Carter @Bacarter77 and It is Art Day will be sharing on the web-based tool, Creatubbles. I adore the global aspect of Creatubbles and the three will be sharing so much more in their collaborative post. Click here for the post about Creatubbles.


The five of us have also put our heads together to work on this table highlighting the features that each app has.  We all agree... All applications are amazing.  Each teacher must choose what works best in their classroom.  Allow us to give you some incite in our blog posts.


Thursday, October 10, 2019

Everyday Art Room: Digital Portfolio Using Seesaw


For the episode of Everyday Art Room, I interviewed 3 experts on creating a meaningful digital portfolio. These are experts on using an app called Seesaw for digital portfolios but this is not the only way to create digital portfolios. The Art of Education University has a ton of articles on using many different platforms to create digital portfolios. Check out their website to do your research (click here).

The experts that I interviewed in this episode are as follows:

Angela Gadke is a Seesaw representative to start out the conversation talking about what tools Seesaw has to offer. You can connect with her on Twitter directly. Or also on social media is Seesaw it's self. Here is a link to their Twitter and one to their Instagram.

Vicki Wilson is a long time 'social media friend' that has inspired me in more ways than just digital portfolios. You need to follow her in some way... either her Twitter or Instagram. I promise you will be inspired in many ways.

A new person in my world is Anais Hernandez. I started following her on Instagram and found her post to be very inspiring when it comes to using Seesaw in the classroom. This is one of those places where this podcast broadens the lens a bit from strickly an Elementary Education Podcast to an 'All of Art Education Podcast'.  Anaise is a High School teacher using Seesaw in her classroom in powerful ways.

I have many past posts as well about the ways I train in my students to use Seesaw and the reasons I use it. Check out some of my past posts about Seesaw here.

Monday, March 6, 2017

Seesaw to Communicate, Advocate, and Celebrate


I have mentioned once or twice about my love for using Seesaw in my classroom.  Recently I joined the twitter chat #satchat, this weekend hosted by +Monica Burns. The question was, 

"What formative assessment data would you want to share with families? How could you do this? #satchat"

I immediately thought of the lesson I just completed on Friday with my 2nd grade. I used Seesaw to share with parents the amazing learning going on in the Art Room.  I was also asking my students to record themselves to show me their learning.  Here is what my classroom looks like as they record their lesson.


Because of the way that I use the tool Seesaw in my classroom I have had more parents come to me in public and know who I am. They thank me for sharing the happenings of my classroom with them.  That is powerful.  I'm able to communicate easily with the families of my school.  At this point of the school year. Students are doing the communicating for me.  They LOVE to hear their voice on Seesaw. 


Doing recordings like this in my classroom has allowed me to advocate for my program.  It's pretty hard to ignore the great art, the deeper thought, the skills that students are creating and developing in the Visual Arts when you have a front row seat to the learning happening in class. My students are advocating for my program.  They are sharing and celebrating the good of this class. Projects will be hung for conferences this month, but parents will have already seen the artwork that will be on the walls and heard an artist statement from their child's mouth.  What a powerful tool!!


If you want to know more great ideas of how to use Seesaw in your classroom, please join myself and @merryksart for a webinar at 4 pm CST this Wed.  It's totally free and it is a great way to get some very relevant PD for Art teachers.  Click here to register. 


Sunday, September 24, 2017

Seesaw Uploading for Kindergarten


This is the third week of school for me and there are so many fun activities happening in my class that I can't wait to shout it from the rooftops.  The best way for me to do this is via Seesaw.  This is the strongest tool in my classroom for advocacy!

For the past couple of weeks, I have been sharing class happenings of the Art Room by recording the action my self and sending it to all parents with just a couple quick steps. Now I want to put this in the hands of my students and what better place to start, but with my Kindergarteners. 


Here's the deal, I set up my station ahead of time.  I show them the big job of coloring that is required.  I tell them they have to get rid of all the 'white spots' and they must ask three before asking me.  When they get three 'yes's' they can come on up and upload their art to Seesaw.

As the K's make it up to me one at a time I walk them through the process. This is my most training I have to do for Seesaw, so I take the time to talk to each student, bring them through the process, and celebrate after they have posted their artwork for their parents to see. 

In one of my classes, I lost my job. This little K was more interested in helping her peers than she was interested in playtime.  I gave her the rule that she could not do it for the students but rather guide with her words and pointing.  She taught the majority of the class how to upload their own work to Seesaw. Talk about empowering students! 

Here is the setup for the unloading station. We were so lucky to receive these 'Justand Tall' iPad stands by ProComputing Products, through curriculum review.  I have an IKEA end table for the base. It is the perfect height for the littles and the stand is incredibly sturdy. I have placed the stations by outlets so I can have the iPad plugged in if needed. I plan to have the stations available at all times for the students to upload their work to Google Drive, Schoology, and/or Seesaw.


Monday, September 5, 2016

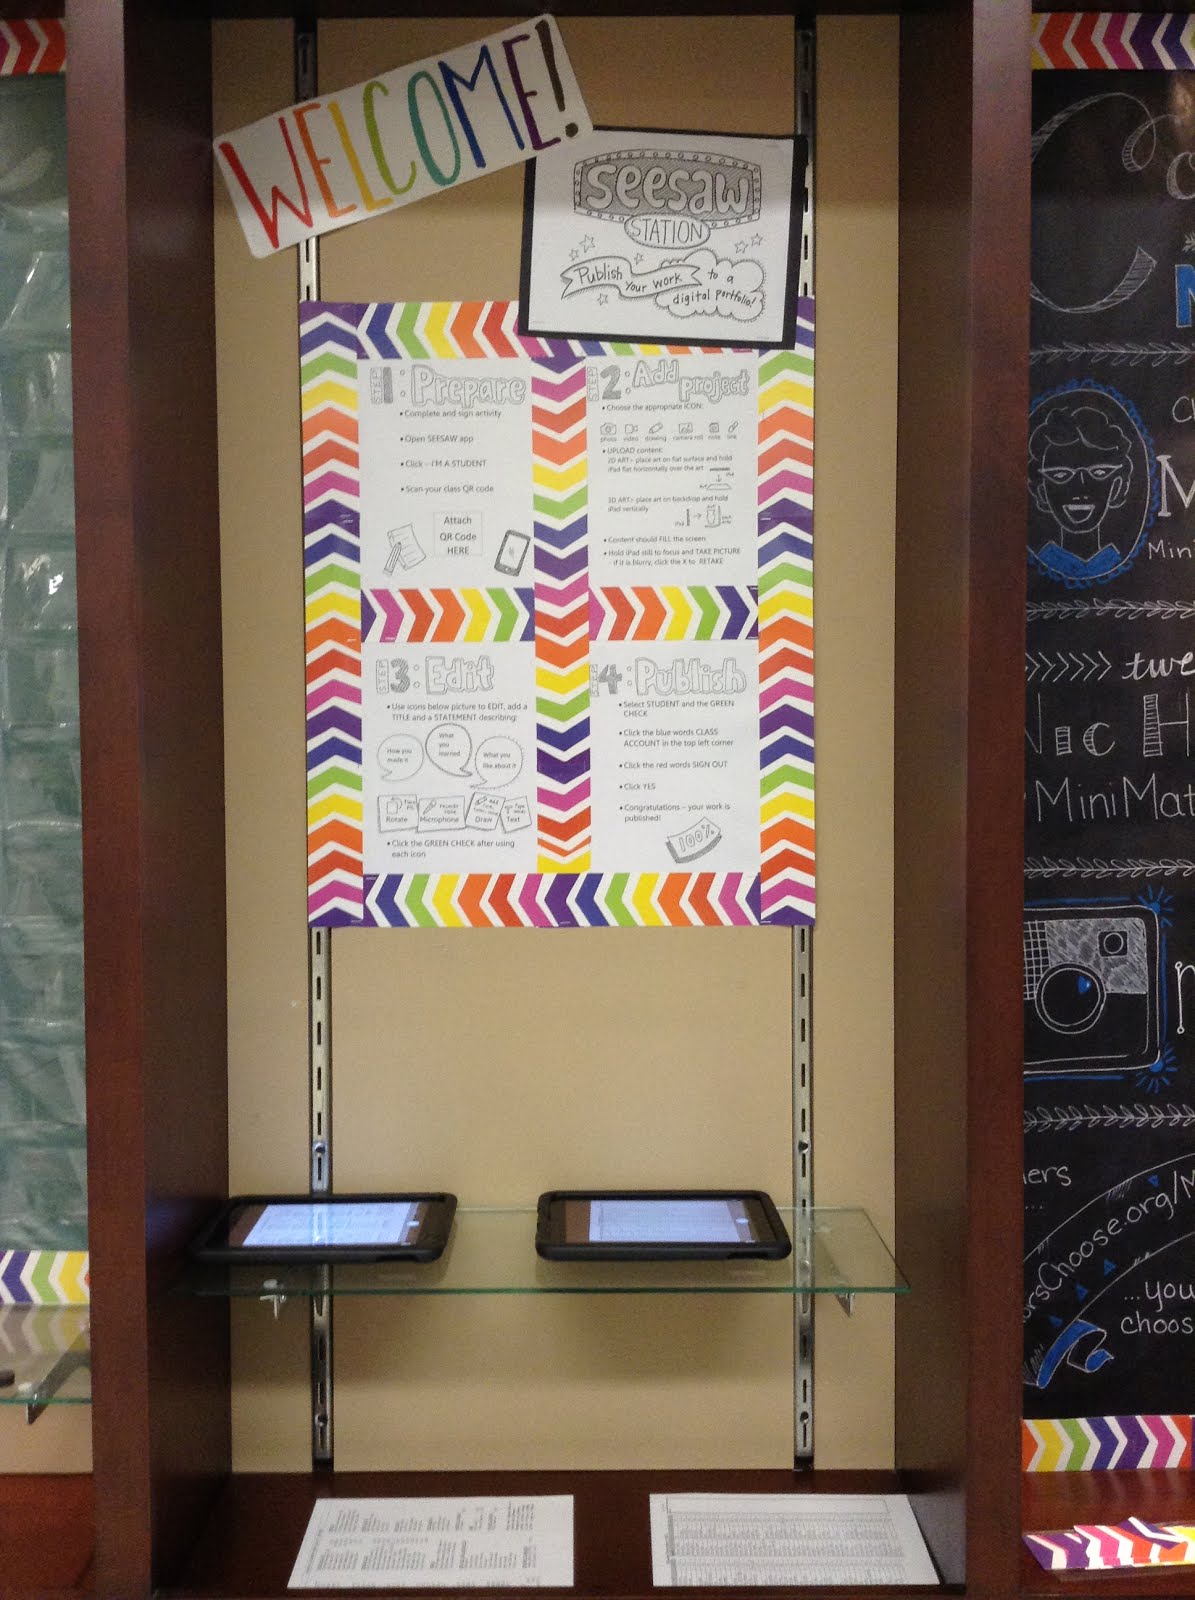
Publishing Station - Seesaw


I have been reading the book Originals by Adam Grant.  I have strung out this book for the last couple of weeks and I'm so glad I have.  It has really given me time to process the words and reflect on them.  One message that I have implemented in my classroom is procrastination.  I am NOT a procrastinator in any way shape or form.  I can not just turn into one either.  For example, I did a little Christmas shopping over the holiday weekend.  So procrastinating on purpose is challenging for me. With my room and classroom philosophy this year, I have procrastinated big time.

I walked into my classroom the first day not knowing how I would arrange it.   I chose to move the table to the edges of the room, I'm creating little pockets of learning.  In doing so I did not have enough room for a Seesaw station. 

What is Seesaw?? It's an app that becomes a digital portfolio and communication tool between students and parents.  It can also be used in a variety of other ways such as assessment or connecting your classroom with others.  If you don't know this app, it's worth checking out. We will be a 'Seesaw School' for Kindergarten through 5th grade.


My friend Mrs. Knight has posted an awesome resource for Seesaw on her Teachers pay Teachers page and it saved me a lot of time (click here). It gives the steps for students to record their work on their own.


As I mentioned, I didn't want to give us space for this publishing stations so I sat on it... and sat on it... deciding what to do.  The day before I had completed a 'Connect with Mrs. Hahn' Bulletin Board and hung it up in the display case outside my room.  I really wanted to have my business cards available for  parents so I was brainstorming with my husband how to do it with the glass that covers the display case.

Plus I really wasn't thrilled with the results of the board with the glare of the glass.  My husband said, 'Just removed the glass. LIGHT BULB!! This is another point in the book Originals, allow 'non-experts' to solve problems.  His very obvious answer to me was not one that I could come up with on my own.  Glass?? Remove?? But there has always been glass there... so... that's the way it's made to be.  His fresh look on my problem solved not only my business card dilemma but also my publishing station situation without even knowing it at the time.  


Instead of taking up learning space in my room. I moved the station outside my room.  This has done a couple of things.  It has allowed a space made for display to be used as learning space.  It will allow the surrounding classrooms around me to use this station for the work being done in their classes. The sleeving is perfect for the iPad to sit on and can be adjusted. And it looks inviting for passers-by, it will show off the learning and self-publishing skills of my classroom throughout the year.


I wanted to make sure two students would be able to be at this station at a time.  By adding a black sheet of paper with a sign on it and a small notch strategically place for the camera, students have no option but to place the iPad in the optimum picture taking position.  The height is perfect for the littles that I work with and it forces two stations for students to easily see they are to share the space. 


There are a couple more additions to be made to the station but for now, I'm really excited with the results.  I'll be sure to report any glitches in the system as well as the station as it's being use.  I'm excited to see it in action.  

Friday, April 8, 2016

Flipped Lessons on Stop Motion Animations


As I mentioned in a previous post, I'm doing a trade with another Art Teacher this week.  My 3-5th grades are doing the same lesson.  They get a SHORT introduction of what stop motion is.  They watch a high tech stop motion example and a lower tech example.  Here is my ever changing playlist of what shown to the students. 


Then I give them a really short explanation of the app Stop Motion Studio.  I decided to video this instruction in case the teachers of RES would like to show their students it, or learn themselves.  I offered a staff development session this morning to the teachers of Rogers Elementary as well. 


Rogers Elementary is a STEM program, so many of the students are technology advanced.  After the first filming of animations, the students asked how they could save it.  I put it out there... well, how do you think we should save it.  They suggested sending to their Google Drive and sharing it after it's on Drive to their other teammates as well as me and their homeroom teacher. 


A coworker (Mrs. Wallesen) suggested that they share the videos with her and they watched them a second time in their homeroom class.  I loved hearing that, I loved that it was shared and celebrated!


Another amazing discovery that was presented to me was the fact that once something is placed on google drive, it can be added into Seesaw quite easily.  Mrs. Tobako, another coworker, explained that you click on the picture > send a copy > more > Seesaw.  Seesaw must be open however to make this work.  AWESOME... this allows students to take so much ownership on their education and presentation. 

Saturday, January 6, 2018

Share the Process using Time-lapse


Using patterns in Art Class is critical to my curriculum. Kindergarten student start learning patterns in Math class early in the year school, so by the New Year, it's a good time to bring it into the art class and do a little review for students who might need to work on the ideas of patterns in a very visual way. Since this concept is new in the Art Studio, I like to give my class a chance to create patterns in the security of a group for the first lesson. I developed a Collaborative Patterns lesson last year. See the previous post for pictures and an explanation video that is student friendly.


Last year, I shared the lesson with pictures on Seesaw and the parents were very receptive.  I wanted to show them the process this year. Show them all the excitement and teamwork that goes into this project.  I created stations by taping down a sheet of large format paper and set some blocks or bottle caps beside it. I chose to set up iPads over each of the stations. Once the kids were in place I simply started the time-lapse on the iPad. 


One of my favorite parts of using the iPads is the ability to show the videos in class using AirPlay. It's a bit glitchy for me sometimes, but when it works... it's amazing! In the video, you can see that the students watch themselves all at the same time. I do this kind of review for stop-motion projects as well. 


When finished, I used AirDrop to send all the videos to my one iPad and I placed the clips together in iMovie.  With a little editing (adding music, speeding up the time-lapse) I then shared it to Seesaw. A quick caption in Seesaw explained to parents the concepts covered for the day. In this case, patterns and working collaboratively. 

This process of recording in time-lapse can be used for all learners.  With older students, you can have them recording their process on their own, and sharing it on social media. I use it for my lessons too.  I often record the process in time-lapse so the kids can see all the actions but in a short amount of time.  If you are unsure of how to use time-lapse, check out this blog post by Matt Klein, How-to Geek.

Image found on HTG by Matt Klein

I know some of you are wondering where do I get those awesome iPad sands.  I know I would be.  Get decided to purchase them through curriculum review and I use them on a very regular basis.  Here is a post explaining where to get these great iPad Stands (click here).

Monday, November 9, 2015

Digital Portfolio Options


I'm having so much fun with this experiment of digital portfolios.  My 4th-grade students have been making ATC's and posting them to Creatubbles.  Students are now just getting into the photographing and excitement of bubbles of Creatubbles.com.  I was asked to write a small piece for The Art of Education that they recently published (click here).  This gives the take on Artsonia and Seesaw as a option too.  I'm trying out Seesaw with my first grade later this year.  Looking forward to it... Will continue to give updates on both, Creatubbles and Seesaw.

Tuesday, May 19, 2020

Hassan Art Studio, K-2 Art Show

It's the end of the school year and we are celebrating students work in a big way at Hassan Elementary. Welcome to the digital gallery for kindergarten through second grade. Our K-2 at ISD728 uses Seesaw as a digital platform. Each frame below is linked to a Seesaw blog.


For a final project, students have been asked to create a tutorial to show us how to make something. I gave two options to create a tutorial and some students even created a video to share their 'lesson' with their peers. In the final week of school, Hassan students will be asked to learn from each other. They will be challenged to find a lesson that their peers have made and create something new. I really think this is a fun way to celebrate the Artists that we have at Hassan Elementary. 

If you like this idea, feel free to use it. Below is a video that shows how I created the digital Art Show and why I created it in this way.


If you want me to slow down on how to create and find the best images for a slide show... here is another video focused on just that.


Wednesday, August 24, 2016

August: TpT Must Follows


This is one of my favorite new practices on this blog.  Once a month I'm celebrating the resources on Teacher Pay Teachers.  Today I'm really excited to share two bloggers that I admire so much and have followed and celebrated for years now. 

First, let me share Art is Basic. Marcia Beckett is the author of the blog, Art is Basic.  We have collaborated on a couple of projects in the past but I follow her blog to learn, learn, and learn how to teach!


I recently bought this Abstract Art Book for my littles.  I'm excited to add it to my lessons for this year.  Thanks Marcia!  


The other blogger I'm celebrating in this post is Hope Knight.  She just shared that she is in her 25th year of teaching... but I don't believe it.  Don't get me wrong, she is an amazing teacher who could only have gotten that way with ample experience. She just looks so darn young :) Hope is the author of Mrs. Knights Smartist Artist.  Again, Mrs. Knight shares so much to the art world.  I admire her! 


I was very excited to see this recent share on Mrs. Knights Smartest Artist TpT store. Our school is becoming a Seesaw school this year for kindergarten through second grade.  This is going to be perfect!! Thanks for saving me time Hope! 


The Seesaw is not the only purchase I have made from Mrs. Knight.  I also bought a "Make it! Planning and Reflection Sheet". Yes, Yes, Yes!! This is amazing. I can't wait to help my students think deeper using this printout. 

Thursday, August 13, 2020

Changing from Edit to Present in Google Slides

I just did a presentation about how to use Seesaw in a specialist classroom and the question came up how to share in present. This is a bit of a hack, but the way I use all the time. Take it or leave it.

I go into my Google Slide show and make sure I'm on the first slide. Then I copy the URL from the top.


Then I paste it into another tab. Where the URL says edit, delete that word... edit... and put the word present. 


Now your slideshow will be in present mode and if you share this new link on Seesaw or with others, they will automatically see it in presentation mode. 


Tuesday, July 12, 2016

Device Managment


Great conversations have been happening in our Art Teachers #PLN (Professional Learning Network) on both Twitter and Facebook.  Here are a couple of questions that have come my way.  I'm going to do my best to answer what is working (or has worked) in my classroom situation. 


Great questions ladies... Let's get started talking about devices. 

I have the opportunity to use both iPads and Chromebooks in my classroom.  I am all about the iPad in an elementary art classroom. I feel that iPads are better for creation.  Chromebooks are awesome for a lot of things too such as writing assignments.  Chromebooks are awesome if you are a Google school sharing Google Docs, Slides, and Forms.  They are awesome if your school is using Schoology and I think they are cost effective.  I would use a Chromebook more often in the middle and high school levels because I was requiring them to share with one another with words and almost every student in my middle/high school level had a device in their pocket if I needed QR code scan or for them to download and app. iPads are better for me in the elementary because we are using creation apps, we are taking pictures of work, and we are scanning QR codes.  Our school also uses Seesaw, a digital portfolio for students, and iPads are perfect for that.  I have been tempted a time or two to try an Android tablet too... they look very versatile as well. 

Link to this image
I'm very lucky to have the opportunity to check out a Chromebook cart and/or an iPad cart.  The carts look like the one above.  They can be rolled down to a room and are checked out at my school using a shared Google calendar.  It works well.  Each grade level has a cart and the specialist share one.  Media has their own carts and lab for class.  A major drawback to these carts, is that the slots for the iPad are small, students are asked to return them in order (that takes time), and they are kind of a pain to plug in.  The solution for this is to have the iPads returned to the top of the cart and a couple of 'technology managers' work at the end of class to return the iPads to the correct area and plug them in.  When you ask a class to do this it takes no less than 15 minutes to complete. 


The fewer devices the better.  I was granted a 'class set' of iPads for the art room this last year. When I say class set, I mean seven student iPads.  I requested this because I have 7 table in my classroom.  For many of the technology supported activities, students can share easily.  When students submit to Seesaw, or take pictures to put on Creatubbles, they can share. When a device is needed for research, many times it can be shared as well.  When we are doing projects of creation or self-paced learning, a full class set is preferred.  I got these rock'n little iPad Baskets for my set.  I LOVE them!!! The are easy to transport and easy to charge.  You can even get them in different colors (click here).


Couple more tips about the iPads.  When I first got my set, I was given iPads with covers.  This did not work because the covers would hide the camera. A primary use of the iPads is to take and share photos.  My solution was to drill a hole in the cover... my dear technology assistant of our school quickly made an order for these iPad covers and they ROCK!  The are kid-friendly and have protected the iPads well.  Draw back is the iPads do have to be shut down manually (I have the settings so that they stay on throughout a class period in case we are using them as a resource). You will note a paper clip taped to the iPad.  This help students know where to look when you are taking a picture of them.  They can find the camera better if you say, look at the paper clip, or sticker... or whatever.  If there is a project that I want to download but don't have time right away, I use masking tape to place on the cover with a little note on it.  It helps me remember what iPad I need when I have the time to download. 


When I do lessons like my self-paced, one-point perspective lesson, I do ask students to bring their headphones.   All of our students use headphones for testing... Isn't it nice to have them also use them for self-learning as well :) I have a set of seven headphones with microphones for students use.  The microphones work AWESOME for students recording their voice... even with a whole active art class in the background.

This is my current situation.  It's pretty sweet, I know. When I was working at the middle school I had a very different situation. I had accessibility to check out a cart but they were hot... everyone wanted to use the iPads for assessment or research.  In the testing months, there was not a lab, or a cart available.  I quietly offered BYOD (Bring Your Own Device).  There was a sign in the front of the room that said device on/off.  When the off sign was on, the devices ha to be in their pockets.  This was mostly during instruction.  When it was on, students were able to have the devices out... fully out, they had to be on the table and students lost all privacy rights while they were using them.  I could pick up the device at any time to see if they were texting, I could pull the earbuds out of their ears to see if their music was appropriate.  If there was any situation that they were not meeting my expectations, they would loose the right to use the devices in my classroom for the rest of the quarter.  The devices were a motivator for sure and students did NOT want to loose them.  In the three years, 12 quarters that I worked at the middle school, I had no problems at all.

Yep, I understand not every kid has a device.  I get it.  I don't have a cell phone. No matter what I do, I always offer a not technology alternative.  I also can most often supplement for the students who do not have a device... having access to about 5 iPads was usually more than enough.

Well, that's what I know, I'm sure there are more tips and tricks out there and I would love you to share in the comments.  Let's share what we know so that we can learn from each other.

Sunday, March 29, 2020

Call to Art: An Un-Conference for Art Teachers


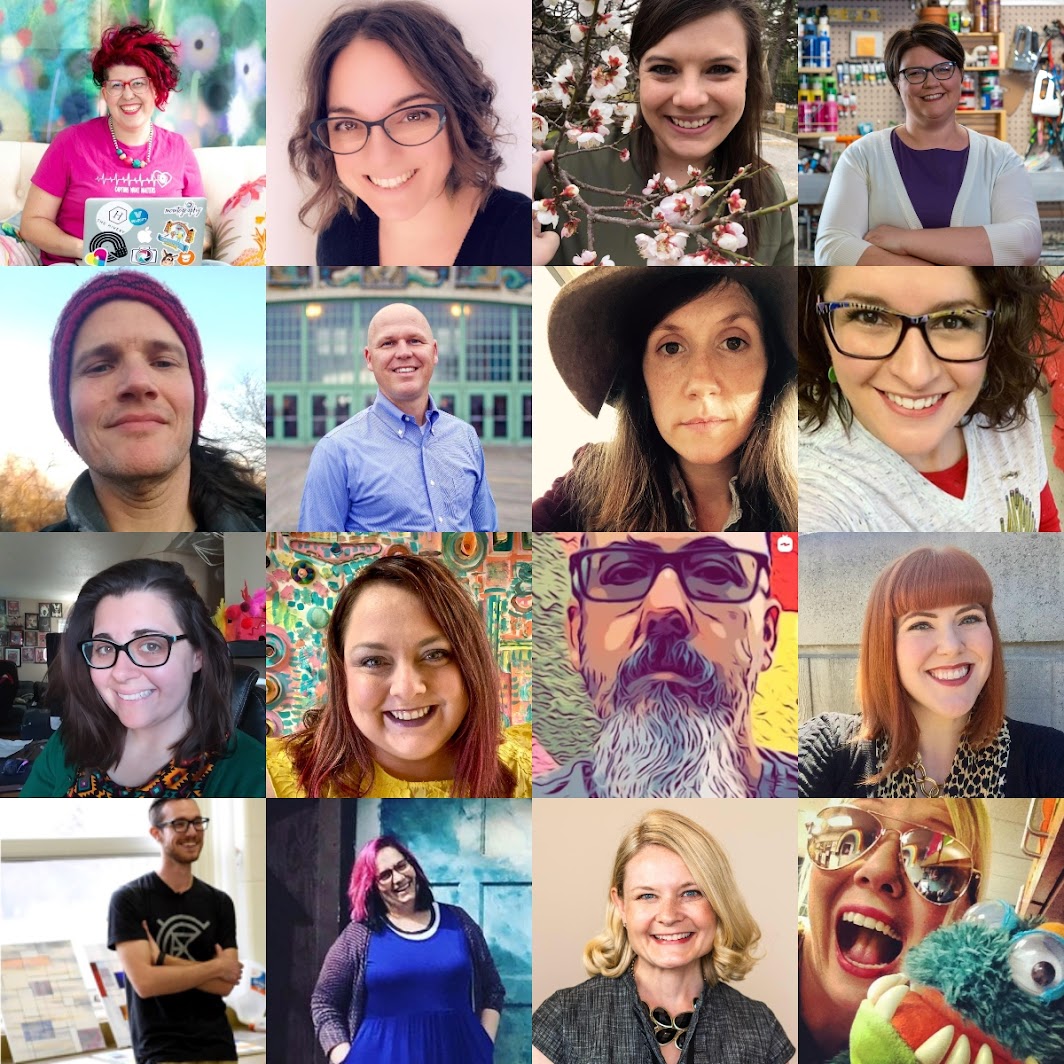
Cindy Ingram and her team at Art Class Curator have enlisted many Art Educators to present at a FREE online Un-Conference. It's been a lot of work for all... but with a lot of passion, so it's been amazing to be part of it. Here are just some of the faces you will see if you join us for the un-conference...


If you would like to see the conference, simply sign up, click here. I will see you on Monday, March 30th. I'll be presenting on the following. 

Distance Learning: Creating a Choice-Based Art Studio for At Home Learners
Nic Hahn
This presentation shows Nic's planning process in the ever-changing world with Covid-19. The information shared in this presentation will change and develop as the weeks continue. Nic will continue to update the processes of her plan on her blog and on social media. Distance Learning can look different for all of us, as our classrooms do as well. Nic's school classroom has been set up as group instruction this year. She has chosen to adapt to the large class sizes by giving more group assignments and less choice. With the change in education currently, her class sizes have reduced in a way. She's able to give her students a choice. By doing this, she is meeting the needs of most of her students and allowing them to choose a process or project that best matches their ability level and interest. She hopes this will create an opportunity for students to be passionate about how they are experiencing their Art Education.

The presentation requires an update... Distance Learning has forced us into continuous learning adjusting and so here we are... This is what I am presenting to my students today... March 30th. The first day of distance learning. I have made a Google Slide show to share with them on a classroom spread sheet (provided from their homeroom teacher), on Seesaw (for K-2 Grade), as well as on Schoology (3-5th Grade). These are the platforms that my district uses. 

Slide #1: 

Slide #2:

This is an image of the slide... however the links are all live... not so much for the students, but more for the parents to connect with me if needed. I also help that the kids will use the resources I've made for them like my YouTube Channel (linked at the top of my blog... see above).


Slide #3

Again, in the slideshow, all the links are available and the video is embedded so the kids can just click and view. The links are to the other slides in the presentation. The video highlights the expectations of the week. 


Slide #4

Every week I will have a new theme... The theme of the week has it's own slide. The main video gives a QUICK explanation of the theme and the choices the students have to create their project. I mention they can do this on their own, or the whole school has the same theme so students can work collaboratively as siblings. The other videos I have are just fun videos revolving around the theme. 

Note: I have the Theme Video on my YouTube the week before however, I have set the video to Premier so it will not be able to be viewed until the week of distance learning starts. 


Slide #5

This is the choice board for ALL students for week one. They get to choose one project, take a picture and post it to Seesaw or upload it to their Google Drive. 3-5th Grade has practiced putting it in their work into a folder titled Art.


Slide #6

This page is all about uploading their work. Students have practiced this a ton in my classroom so this is just to help the parents and the students who need the reminder. 


Slide #7

This is an extra slide that is built for my Gifted and Talented kiddos or those who have a high interest in Art. Again... all the links are live and I have checked with my tech department to make sure they are all open to students. 


I have chosen to share screenshots rather than this slideshow presentation so that you can see what I've created... but it was made for my students.  A lot of this content is specific to my classroom or to the skills my students already have.